
📑 Table of Contents ▶
Cake Pops
Creating cake pops is not just baking; it’s about revisiting childhood memories and sparking joy. Memories of school parties where delightful cake pops decorated the dessert table bring back smiles. Cake pops make any event feel special, and baking them invites creativity into your kitchen.
The best part about making cake pops is how simple yet pleasing they are. Each pop can wear colourful sprinkles or unique designs, reflecting your style. As a dessert lover, turning a simple cake mix into delightful treats excites me. The process transforms a basic cake into bite-sized pieces of happiness.
Crafting cake pops fosters connection. Friends and family gather, excited to roll, dip, and decorate these little wonders. Each bite delivers a burst of sweetness. With every step, the anticipation builds, making the final result so much more rewarding. Cake pops are about sharing moments and having fun in the kitchen.
Fundamentals
Let’s dive into the fundamentals of making cake pops. Start with the essentials: a high-quality cake mix, eggs, and frosting. For this recipe, you need one box of Betty Crocker vanilla cake mix, three eggs, and a cup of water. These simple ingredients set the stage for your delicious cake pops, serving as the base for the treats you’ll create.
The real magic begins when you mix the dry ingredients with eggs and water, resulting in a batter that will bake into a fluffy cake. It’s vital to preheat your oven according to the package instructions while leaving out oil. This minor tweak ensures your cake pops won’t become overly moist during the crumbling phase.
After baking, allow the cake to cool completely before crumbling it into fine crumbs. This stage is crucial because it allows you to incorporate frosting seamlessly. You want to achieve a dough-like consistency that holds together without becoming mushy. Use a mixing bowl and crumble the cooled cake with your hands or a fork for an even texture. This garners the perfect foundation for forming those irresistible cake balls.
Preparation/Setup
Preparation is key to a smooth cake pop-making experience. Make sure your workspace is clean and organized. Gather all necessary tools, including a mixing bowl, measuring cups, and a microwave-safe container for melting vanilla wafers. Keeping everything within reach will streamline the process and enhance enjoyment.
It’s essential to focus on timing during preparation. Set aside enough time to bake the cake, let it cool completely, and then crumble it. This careful approach ensures that each step flows into the next without feeling rushed. Once your cake is crumbled and mixed with the frosting, get your candy sticks ready.
Melting the Ghirardelli white vanilla melting wafers can seem daunting, but it isn’t. Use a double boiler or microwave, melting in 15-second increments to avoid burning them. Once melted, you’ll dip the ends of candy sticks into the warm mixture before inserting them into the cake balls. This step helps secure the sticks in place.
Ingredients
Gathering the right ingredients is integral to creating delightful cake pops. You will need:
- 1 box of Betty Crocker vanilla cake mix
- 3 eggs
- 1 cup of water
- 1 can of vanilla frosting
- 10 oz Ghirardelli white vanilla melting wafers
- 36 candy sticks
- Sprinkles for decoration
Each item plays a vital role in crafting these delicious treats. The vanilla cake mix offers a light and airy texture that complements the rich frosting. The eggs and water work together to create a moist cake, while the vanilla frosting adds sweetness and binds the cake crumbs into perfect little balls.
The melting wafers are where you can let your creativity shine. You can alter the appearance of your cake pops with coloured wafers or add toppings to suit various occasions. The sprinkles? They add that perfect touch of fun.
Directions
Now for the exciting part – the directions! Follow these steps to create your delicious cake pops:
- Preheat your oven and bake the cake according to the package instructions, leaving out the oil.
- Once baked, let the cake cool completely.
- Crumble the cooled cake into fine crumbs in a mixing bowl.
- Add one tablespoon of frosting at a time until you can form a ball, ensuring it’s not mushy.
- Melt some vanilla wafers using a double boiler or in the microwave in 15-second increments.
- Dip the end of each candy stick into the melted wafers, then push them into the cake balls.
- Allow the cake pops to cool for at least an hour.
- Melt the remaining vanilla wafers, transfer them to a cup, and dip the cake ball into the melted wafers, lifting straight up and tapping off any excess.
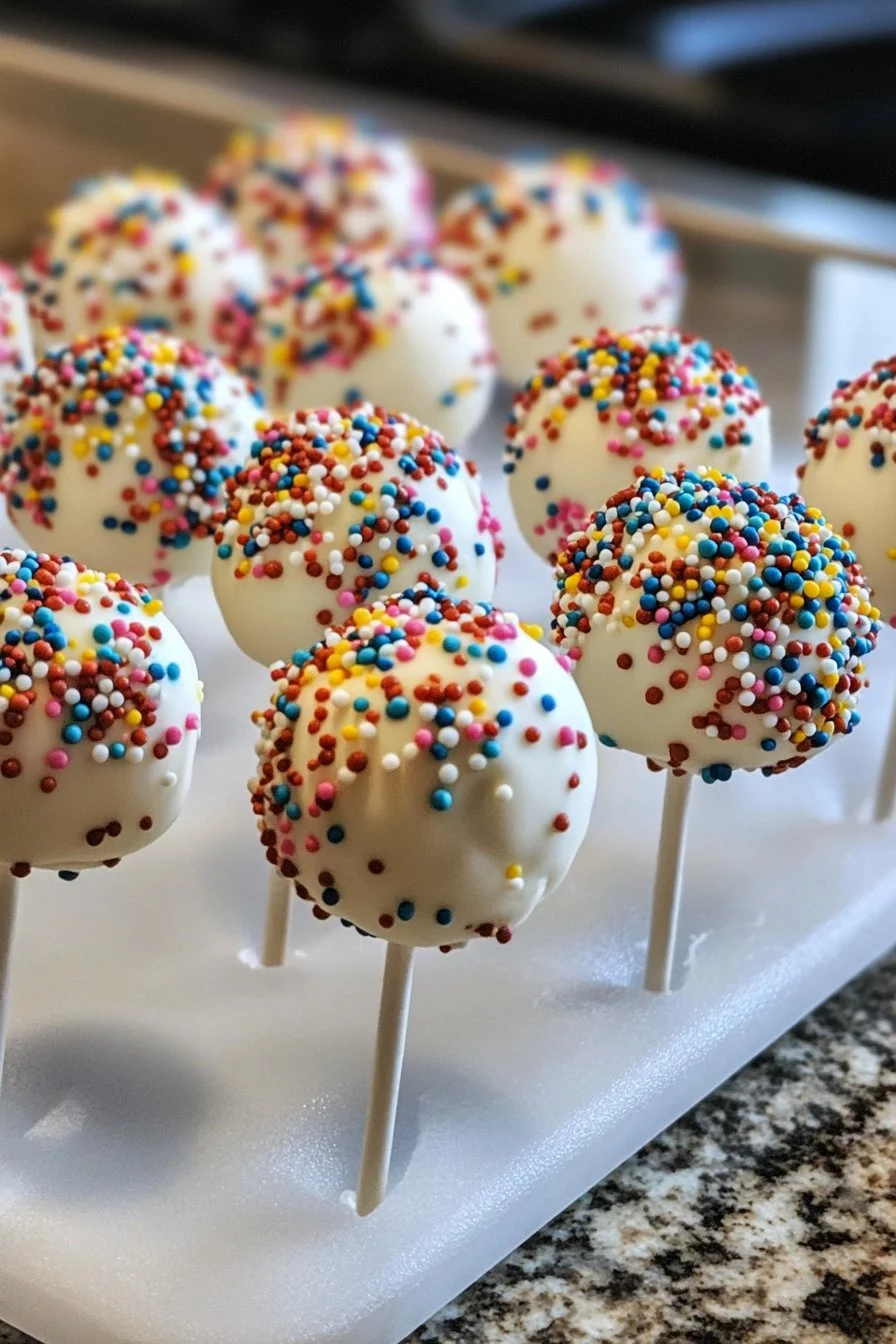
- Add sprinkles for that extra flair!
Technique
The technique behind cake pops is essential for achieving that perfect balance of taste and appearance. Start by ensuring the cake mix is well blended. Carefully follow the package instructions for best results. Once the cake is baked and cooled, the crumbling process should feel meditative, almost therapeutic.
When mixing in the frosting, take your time and add it gradually. The goal is to find the right consistency for rolling. Too much frosting leads to a mushy mixture, while too little will not form a well-holding ball.
Getting the temperature of the melted wafers right is crucial. If they are too hot, they can become too thin and runny. If not warm enough, they won’t coat the cake pops properly. Practice makes perfect in finding that sweet spot for dipping.
Tips/Tricks
A few tips and tricks can elevate your cake pops. Use a cookie scoop for evenly sized cake balls to ensure uniformity. They will bake and set consistently, giving a polished look to your pops. A little patience goes a long way during cooling – don’t rush this step.
If the cake pops start to sag, chill them briefly before dipping. This action firms them up, making the coating process much easier. Experiment with different shapes or decorations too! Use food-safe paintbrushes for detailed designs, and don’t shy away from layering various sprinkles for a fun finishing touch.
Perfecting Results
Perfecting your cake pops takes practice and attention to detail. The cooling time is vital because it affects how well the chocolate coating adheres. If the cake pops are still warm, the melted wafers will not set properly, leading to a melting mess instead of a cute treat.
Try adjusting the proportions between frosting and cake crumb as you gain experience. This consideration will help you customise the texture to match your preferences.
If you find that your cake pops are cracking during the dipping process, it indicates an issue with refrigeration or temperature. Be sure to keep them chilled before dipping and ensure that the coating is at the right consistency.
Troubleshooting/Variations
Troubleshooting common issues with cake pops is straightforward. If they fall off the stick, make sure to dip the stick into the melted wafers before inserting it into the cake ball. This step creates a glue-like effect that keeps the cake pop secure.
Feeling creative? Try introducing different flavour profiles! Add a hint of almond extract or lemon zest to the cake batter for a fresh twist. Alternatively, experiment with chocolate wafers instead of vanilla for a naughty indulgence.
Serving/Presentation
Presentation should be fun and engaging. Arrange cake pops in a whimsical way for any gathering, allowing guests to pick their favourites. Use foam blocks or decorative vases with shredded paper to present the pops upright. This stunning display adds a cheerful touch to any dessert table.
Consider themed decorations based on the occasion. Whether it’s pastel colours for spring or vibrant hues for a birthday, the display can enhance the experience.
Pairings/Storage
Cake pops align perfectly with an array of snacks or beverages. Pair them with fresh fruits or mini desserts for a delightful dessert spread. They also work beautifully alongside tea or coffee – creating a sweet moment during afternoon breaks.
For storage, keep your cake pops in an airtight container at room temperature for 3-5 days. If you aim to store them for longer, consider refrigerating them for freshness.
Conclusion
Creating cake pops is about embracing fun and creativity in the kitchen. The journey from simple ingredients to delightful treats invites smiles and sweet moments. Cake pops serve as perfect celebratory desserts, allowing for personalisation and decoration suited to any occasion.
With the steps outlined in this article, crafting cake pops can fit into anyone’s busy schedule. The end result delights the eyes, making flavours even more enjoyable. Each bite brings a little joy and comfort, perfect for sharing or savoring solo. Creating beautiful moments with cake pops makes for delightful culinary adventures that you can continue to explore.

Cake Pops
Ingredients
Method
- Preheat your oven and bake the cake according to the package instructions, leaving out the oil.
- Once baked, let the cake cool completely.
- Crumble the cooled cake into fine crumbs in a mixing bowl.
- Add one tablespoon of frosting at a time until you can form a ball, ensuring it’s not mushy.
- Melt some vanilla wafers using a double boiler or in the microwave in 15-second increments.
- Dip the end of each candy stick into the melted wafers, then push them into the cake balls.
- Allow the cake pops to cool for at least an hour.
- Melt the remaining vanilla wafers, transfer them to a cup, and dip the cake ball into the melted wafers, lifting straight up and tapping off any excess.
- Add sprinkles for that extra flair!