
📑 Table of Contents ▶
- Cheesy Enchilada Hamburger Helper: An Unforgettable Dish
- Fundamentals
- Preparation/setup
- Directions
- Cheesy Enchilada Hamburger Helper: Techniques to Perfect It
- Technique
- Tips/Tricks
- Cheesy Enchilada Hamburger Helper: Perfecting the Results
- Perfecting results
- Troubleshooting/variations
- Cheesy Enchilada Hamburger Helper: Serving and Storage
- Serving/presentation
- Pairings/storage
- Ingredients
- Method
Cheesy Enchilada Hamburger Helper
Welcome to Eatimi ! I’m Olivia Hart — a home-cook who believes delicious food doesn’t need complicated techniques. Here I share easy everyday recipes, family meals, quick ideas for busy days and helpful kitchen tips to make cooking simple and fun. My goal is to help you feel confident in the kitchen and enjoy homemade food with joy, comfort and love. 💛
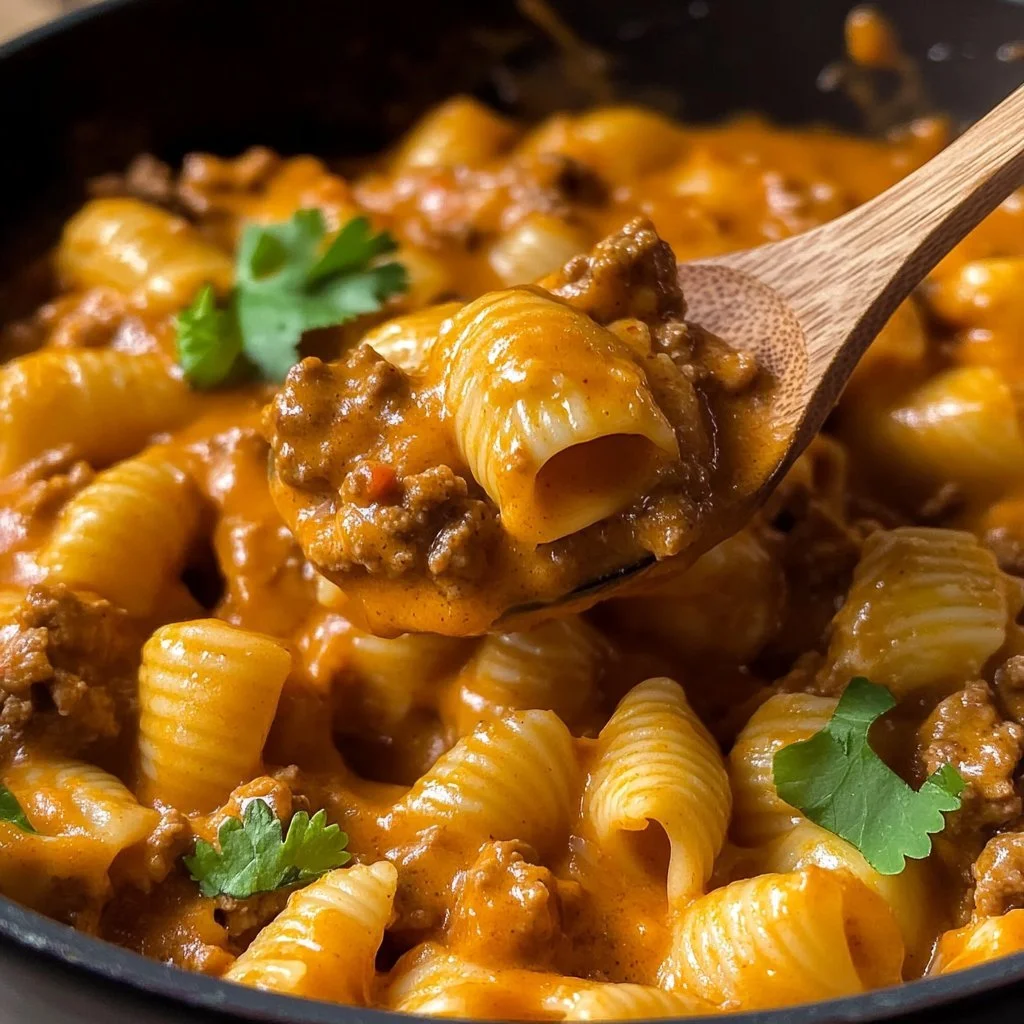
The first time I made Cheesy Enchilada Hamburger Helper, I found myself reminiscing about cozy family dinners and simple pleasures. The vibrant flavours of enchilada sauce paired with juicy ground beef instantly transported me to my childhood kitchen, where cooking felt effortless and oh-so-rewarding.
As I sautéed the chopped onion, the aroma filled my home, evoking memories of laughter and warmth. This dish quickly became a staple in my cooking repertoire. Cheesy Enchilada Hamburger Helper combines the delightful spirit of enchiladas with the ease of a one-pot meal.
Each spoonful bursts with cheesy goodness and a hint of spice. When you’re pressed for time or just want to indulge in something comforting, this recipe is there to save the day. You’ll adore how uncomplicated it is while delivering big, bold flavours.
Cheesy Enchilada Hamburger Helper: An Unforgettable Dish
Fundamentals
Understanding the basics of your ingredients can enhance your cooking experience. When preparing the Cheesy Enchilada Hamburger Helper, start with high-quality ground beef; its flavour serves as the foundation of this dish. Opt for lean ground beef for less grease and easy preparation.
Onion adds a depth of flavour that harmonises with the beef. Chop it finely so it cooks evenly and melds well with the other ingredients. Elbow macaroni binds this dish together, providing a chewy texture that perfectly soaks up the enchilada sauce.
The enchilada sauce gives a zesty kick that elevates the dish from ordinary to extraordinary. When combined with shredded cheddar cheese, the melty goodness transforms this recipe into a soul-warming meal.
Preparation/setup
Preparation begins with a large skillet over medium heat. This allows you to brown the ground beef and onion thoroughly. Make sure to stir occasionally, ensuring even cooking and preventing any sticking.
Once the beef is no longer pink and the onion is soft and translucent, draining the excess fat is essential. This step keeps the dish from becoming greasy and maintains the perfect balance of flavours.
Now it’s time to add the remaining ingredients. Pour in 2 cups of water and the can of enchilada sauce, followed by the macaroni, garlic powder, salt, and pepper. Stir it well to combine all the flavours.
Bring the mixture to a boil, then lower the heat. Cover it and let it simmer. This step allows the macaroni to cook while absorbing the delicious flavours of the enchilada sauce.
Now, you just have to wait. Give it about 20 minutes on low heat, stirring occasionally to prevent sticking.
Ingredients
This delightful recipe requires just a few essential ingredients:
- 1 pound ground beef
- 1 onion, chopped
- 2 cups water
- 1 can (15 oz) enchilada sauce
- 2 cups elbow macaroni
- 1 cup shredded cheddar cheese
- 1 teaspoon garlic powder
- Salt and pepper to taste
Using these simple ingredients, you can create a comforting dish that is sure to satisfy.
Directions
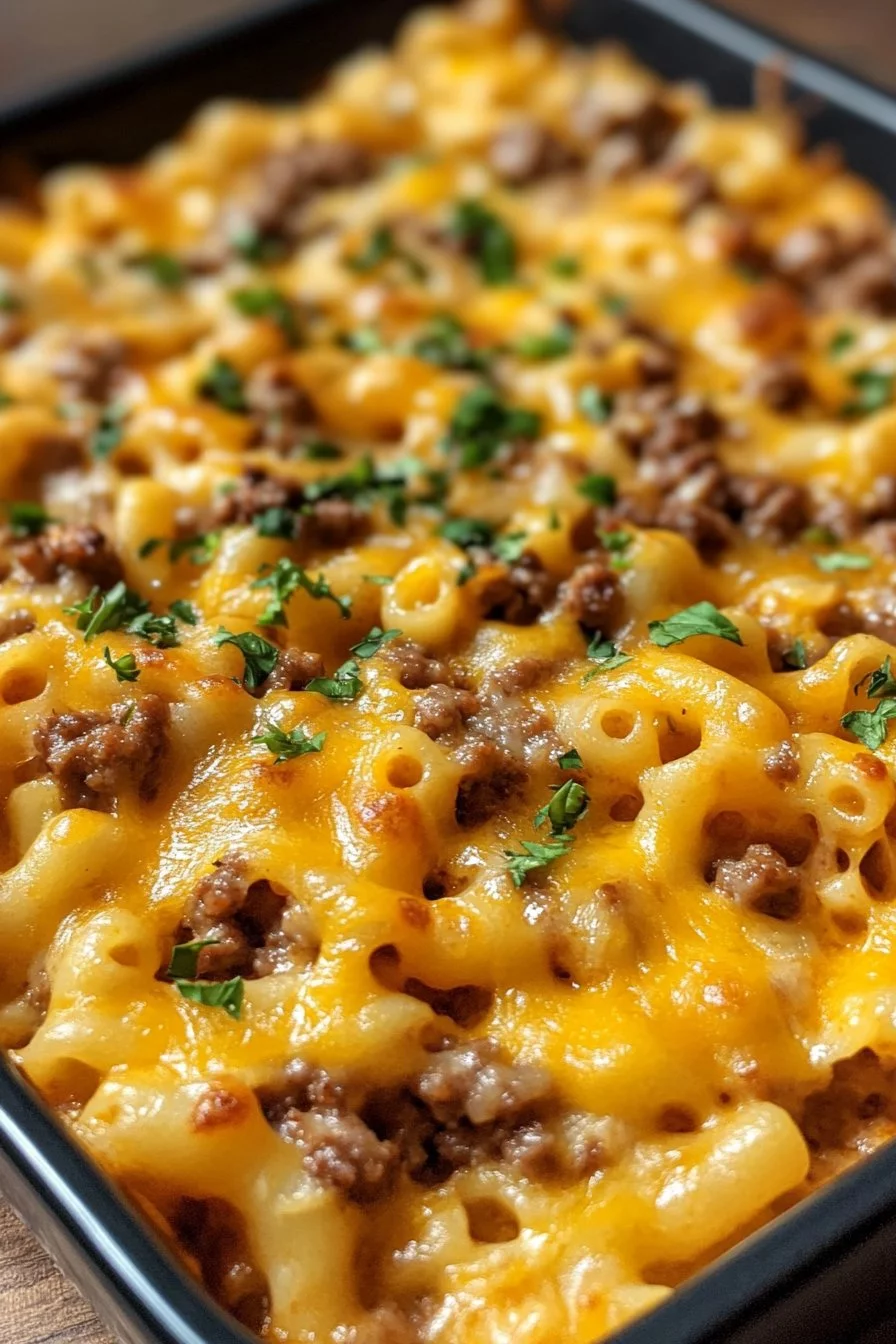
Start by browning the ground beef and onion in a large skillet over medium heat until the meat is no longer pink. Drain the excess fat. Stir in water, enchilada sauce, macaroni, garlic powder, salt, and pepper. Bring to a boil, then reduce heat to low, cover, and simmer for about 20 minutes or until the pasta is cooked through. Remove from heat and stir in shredded cheddar cheese until melted. Serve hot.
Cheesy Enchilada Hamburger Helper: Techniques to Perfect It
Technique
Embracing the right techniques can elevate your cooking and ensure success. Browning the meat properly is key; it develops rich flavours. Don’t overcrowd the skillet, as this can lead to steaming instead of browning.
Watch the heat during simmering. A gentle simmer helps the macaroni cook uniformly, ensuring it becomes tender but not mushy.
Mixing in the cheese off the heat ensures it melts perfectly without becoming oily. Stir methodically until the cheese thoroughly combines with the pasta, creating a creamy texture.
Tips/Tricks
A few culinary tricks can make the process easier and the results better. If you want to add even more flavour, try seasoning your ground beef with your preferred spices before browning. Cumin or chili powder can heighten that enchilada essence.
For a bit of crunch, consider topping the dish with crushed tortilla chips or fresh herbs like cilantro after serving. It adds a delightful texture and freshness.
Adjusting the consistency of your dish is simple — if you prefer a more saucy feel, add a bit more water or enchilada sauce during cooking. This flexibility lets you tailor the recipe to your liking.
Cheesy Enchilada Hamburger Helper: Perfecting the Results
Perfecting results
Creating the perfect Cheesy Enchilada Hamburger Helper is an art. Adjust the cooking time according to how soft you want the macaroni. After simmering for about 15 minutes, check if it reaches your desired texture.
To enhance the overall taste, feel free to sprinkle some extra cheese on top before serving. A good broil for a couple of minutes can create a delightful cheesy crust that makes the dish even more appealing.
Troubleshooting/variations
If your dish turns out too thick, adding a splash of water can help reach the desired consistency. Conversely, if it seems too watery, prolonging the cooking time can help it thicken up.
For different flavour profiles, try adding black beans or corn. These ingredients complement the enchilada sauce beautifully, bringing variety to each bite. You might even experiment with different types of pasta or cheese for a unique twist.
Cheesy Enchilada Hamburger Helper: Serving and Storage
Serving/presentation
Serving Cheesy Enchilada Hamburger Helper is as straightforward as it is satisfying. Use large, shallow bowls to showcase the dish, and sprinkle fresh herbs or additional cheese on top for visual appeal.
A side of salad can add a refreshing touch, balancing the richness of the meal with some crisp greens. Making it visually enticing enhances the overall dining experience and can impress even the pickiest eaters.
Pairings/storage
When it comes to storage, this dish keeps well in an airtight container for up to three days in the fridge. If you want to freeze leftovers, it can last up to two months. Reheating is easy—just microwave in short intervals or heat on the stovetop, adding a splash of water or sauce if needed.
Although this dish is satisfying on its own, it pairs beautifully with sides like cornbread or a zesty coleslaw for added texture and flavour.
Though this recipe doesn’t include any specific drink pairings, refreshing beverages like iced tea or homemade lemonade can complement your meal well.
Cooking is a journey full of exploration, and there are endless opportunities to become creative in the kitchen with Cheesy Enchilada Hamburger Helper. Each preparation creates memories while bringing comfort to the table, making it an essential dish in your home-cooking repertoire.

Cheesy Enchilada Hamburger Helper
Ingredients
Method
- Brown the ground beef and onion in a large skillet over medium heat until the meat is no longer pink.
- Drain the excess fat to prevent greasiness.
- Stir in water, enchilada sauce, macaroni, garlic powder, salt, and pepper.
- Bring to a boil, then reduce heat to low, cover, and simmer for about 20 minutes or until the pasta is cooked through.
- Remove from heat and stir in shredded cheddar cheese until melted.
- Serve hot.