
📑 Table of Contents ▶
Fairy Bread-Inspired Cake Pops
Welcome to Eatimi! I’m Olivia Hart — a home-cook who believes delicious food doesn’t need complicated techniques. Here I share easy everyday recipes, family meals, quick ideas for busy days and helpful kitchen tips to make cooking simple and fun. My goal is to help you feel confident in the kitchen and enjoy homemade food with joy, comfort and love. 💛
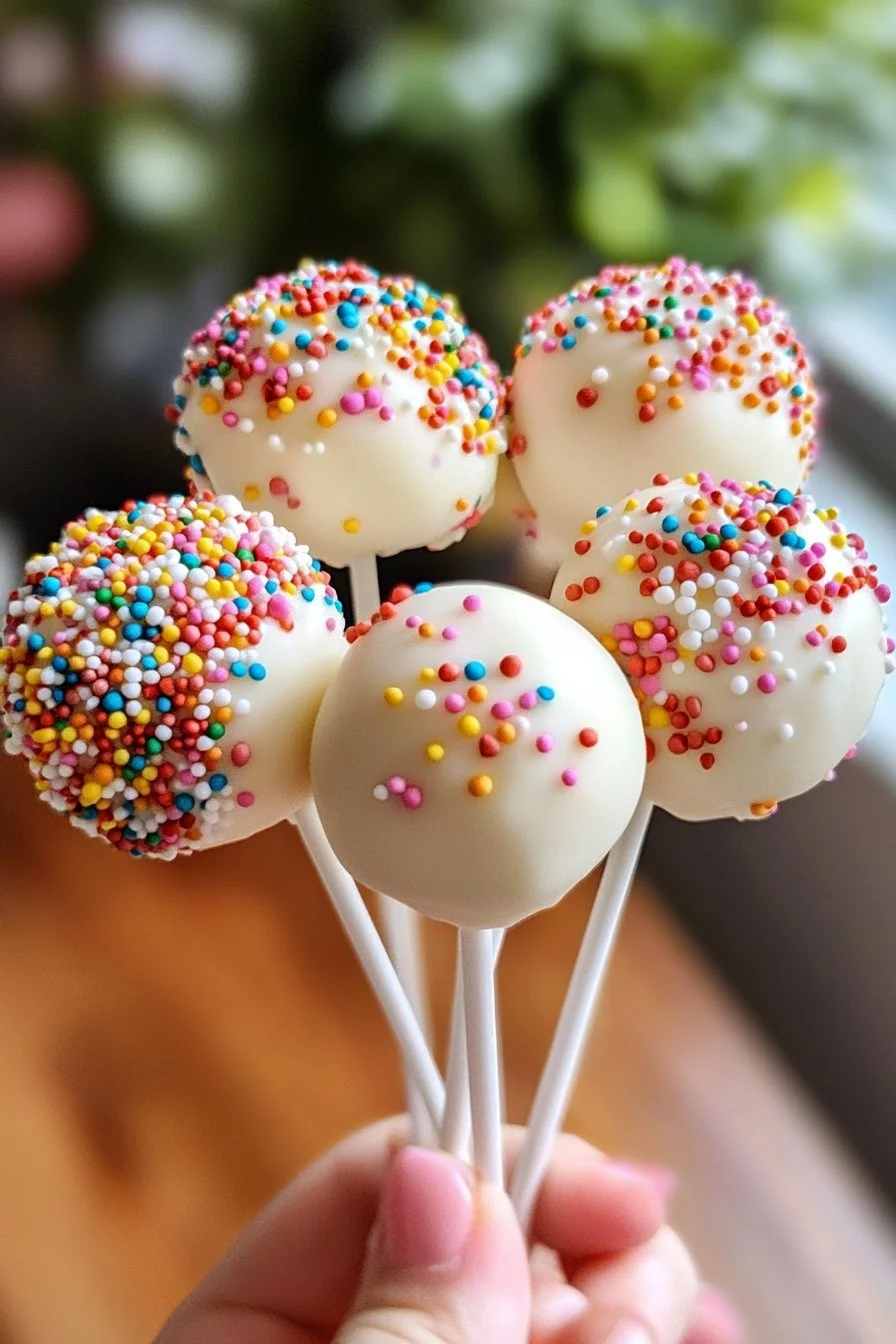
Creating delectable treats has always been a passion of mine, especially when those treats come with a sprinkle of nostalgia—like fairy bread-inspired cake pops. The concept of fairy bread warms my heart, reminding me of carefree childhood parties filled with laughter and vibrant colours.
Biting into a cake pop transports me straight to my childhood, where spreading butter on bread and sprinkling colourful toppings created delightful snacks. In this recipe, I elevate that simple joy by turning it into cake pops. Imagine transforming a regular cake mix into bite-sized treasures that glisten with melted chocolate and shimmer with rainbow sprinkles.
The magical flavour combination of cake, frosting, and colourful toppings invites a grin with every bite. Let’s explore how to make these fairy bread-inspired cake pops together, filling our kitchens with laughter and joy.
Fairy Bread-Inspired Cake Pops
Fundamentals
Crafting fairy bread-inspired cake pops begins with understanding the essentials. You’ll need a cake mix of any flavour—which provides the base for your pops. Pick your favourite for more personal flair. Alongside your cake mix, gather a cup of frosting and some rainbow sprinkles for that signature fairy bread look.
Candy melts or chocolate serve as the outer coating, adding a luscious layer that ties everything together. The simplicity of these ingredients allows for creativity in flavours and styles without straying from comfort.
This recipe takes a few easy steps, making it perfect for both baking novices and seasoned chefs alike. The process involves baking, crumbling, mixing, and forming, resulting in delightful, poppable treats.
Preparation/setup
Start by preheating your oven, preparing the baking pan, and gathering mixing bowls. Follow the package instructions of your chosen cake mix for the perfect bake. Once baked, allow your cake to cool completely; this step prevents a melted mess when forming the pops.
Next, prepare a baking sheet lined with parchment paper. This will hold your cake balls as they set. Gather your frosting and ensure it’s soft enough to mix easily into the cake crumbles. Proper preparation sets the stage for success in crafting these whimsical treats.
Ingredients
- 1 cake mix (any flavour)
- 1 cup frosting (any flavour)
- Rainbow sprinkles
- Candy melts or chocolate for coating
Directions
- Bake the cake mix according to package instructions and let it cool completely.
- Crumble the cooled cake into a large bowl.
- Mix in the frosting until fully combined.
- Form the mixture into small balls and place them on a baking sheet.
- Insert a stick into each ball and freeze for about 30 minutes.
- Melt the candy melts or chocolate according to package instructions.
- Dip each cake pop into the melted chocolate and then roll in rainbow sprinkles.
- Allow the pops to set before serving.
Mastering Cake Pops
Technique
Mastering the technique of making cake pops can elevate your culinary prowess. The key lies in the balance of crumbling the cake and mixing it with frosting. Avoid overmixing, as this can make your cake pops too dense.
Utilizing cold sticks may help stabilize the pops during the coating process. Chill the cake balls before dipping them in chocolate to prevent them from falling apart. This technique ensures that each pop retains its round shape and achieves the perfect dipped finish.
Tips/tricks
For optimal results, allow extra cooling time if your cake mix has a moist consistency. Working with semi-frozen balls makes the dipping process smoother and less messy. If the chocolate thickens, warming it gently can help maintain the right dipping consistency.
Feel free to get creative with the sprinkles. Use themed sprinkles or colours that align with the occasion to add a personal touch to your cake pops. The more colourful and fun they look, the more inviting they become!
Perfecting Your Cake Pops
Perfecting results
Achieving the perfect cake pop can take practice, but small adjustments lead to remarkable outcomes. Use a cookie scoop for consistently sized cake balls. This measurement ensures even baking and coating adherence as every pop deserves to shine equally.
Opt for a quality chocolate or candy melt for a smooth finish. The right coating not only enhances flavour but also provides a beautiful exterior as you roll your pops in sprinkles. Patience is critical—allow the pops to cool after dipping to prevent smudging and maintain their presentable look.
Troubleshooting/variations
If your cake pops crumble while dipping, revisit the frosting ratio. A little additional frosting can help bind the mixture better. In contrast, if the cake balls are too sticky, a short chill in the freezer can help firm them up.
Consider experimenting with different flavours for both the cake mix and frosting. Vanilla cake with colourful icing offers a classic approach; chocolate cake with peanut butter frosting can create a delicious twist. The possibilities are endless, aligning well with your unique taste preferences.
Serving Your Cake Pops
Serving/presentation
Serving cake pops is an opportunity to showcase creativity. Place them in a decorative paper or gift box for gatherings. Alternatively, use a styrofoam block to stand them upright, creating an appealing display.
Consider adding tags or labels to share different flavours with your guests. The excitement of different surprises in each pop can enhance your gathering, making each bite a delightful adventure.
Pairings/storage
These cake pops pair well with a variety of beverages, like milk, hot chocolate, or fruit juices, enhancing their delightful sweetness. With their vibrant colours and fun design, they fit right in at birthdays, picnics, or casual gatherings.
For storage, keep them in an airtight container in the fridge to maintain freshness—ideally for up to a week. This keeps your cake pops moist and delicious while retaining that charming presentation.
Conclusion
Creating fairy bread-inspired cake pops allows everyone to reconnect with joyful memories and indulge in delightful treats. With just a few simple steps, you can craft an exciting dessert that is sure to impress both children and adults alike. The combination of cake, frosting, and sprinkles transforms ordinary moments into extraordinary celebrations. Embrace the creativity and fun that come with each pop, celebrating life’s sweet occasions with every delicious bite.
Fairy Bread-Inspired Cake Pops
Ingredients
Method
- Preheat your oven according to the cake mix package instructions.
- Prepare the baking pan as instructed and bake the cake mix.
- Allow the baked cake to cool completely.
- Crumble the cooled cake into a large bowl.
- Mix in the frosting until fully combined.
- Form the mixture into small balls and place them on a baking sheet.
- Insert a stick into each ball and freeze for about 30 minutes.
- Melt the candy melts or chocolate according to the package instructions.
- Dip each cake pop into the melted chocolate and then roll in rainbow sprinkles.
- Allow the pops to set before serving.