
📑 Table of Contents ▶
Homemade Cake Pops
Welcome to Eatimi! I’m Olivia Hart—a home-cook who believes delicious food doesn’t need complicated techniques. Here I share easy everyday recipes, family meals, quick ideas for busy days, and helpful kitchen tips to make cooking simple and fun. My goal is to help you feel confident in the kitchen and enjoy homemade food with joy, comfort, and love. 💛
Homemade cake pops deliver a delightful treat that brings smiles to faces young and old. The vibrant colours, rich textures, and irresistible sweetness make them a must-have for any celebration. Picture a rainy day when you decide to whip up something special. Maybe the kids are helping, giggling as they roll the cake into balls. The aroma of cake fills the house, igniting memories of baking with your own family.
Using simple ingredients, these cake pops create moments of joy and a sense of satisfaction. Whether it’s a birthday party, a casual get-together, or simply an excuse to indulge, homemade cake pops serve as the ultimate crowd-pleaser. The beauty lies in their versatility—experiment with sprinkles, flavours, and decorations to match any occasion.
Each step in making these treats adds to the excitement. From baking the cake to dipping those perfectly formed balls in rich chocolate, every part brings comfort and creativity. The satisfaction of seeing your loved ones devour these sweet delights makes the effort worthwhile.
Homemade Cake Pops: The Basics
Fundamentals
Homemade cake pops transform simple ingredients into a delightful dessert. They capture the essence of childhood memories, fun celebrations, and creative expressions through food. The process is straightforward, yet it allows for endless variations, shaping each bite according to personal preferences.
Using a box cake mix makes this a breeze. It simplifies your preparation time while ensuring a delicious end result. Focus on the fun of the process—baking, crumbling, mixing, and decorating. This delightfully simple approach invites everyone into the kitchen, making it a perfect family activity.
Preparation/Setup
Before diving into the baking, gather your ingredients. You’ll need one box of cake mix, three large eggs, half a cup of vegetable oil, and one cup of water. Additionally, grab one can of frosting, one to two cups of chocolate or candy melts, lollipop sticks, and sprinkles for optional decorating.
Prepare your baking pan and preheat your oven according to the package instructions. Once the oven is ready, mix the cake ingredients as per the box instructions. Enjoy the scents swirling around the kitchen as the cake bakes. After baking, let the cake cool completely—this is crucial for forming your cake pops.
Ingredients
- 1 box cake mix
- 3 large eggs
- 1/2 cup vegetable oil
- 1 cup water
- 1 can frosting
- 1-2 cups chocolate or candy melts
- Lollipop sticks
- Sprinkles (for decorating, optional)
Directions
- Bake the cake according to package instructions and let it cool completely.
- Crumble the cake into a large bowl.
- Add the frosting to the crumbled cake and mix until combined.
- Scoop out portions of the mixture and roll them into balls.
- Insert lollipop sticks into the balls and refrigerate for at least 1 hour.
- Melt the chocolate or candy melts in the microwave.
- Dip each cake pop into the melted chocolate, allowing excess to drip off.
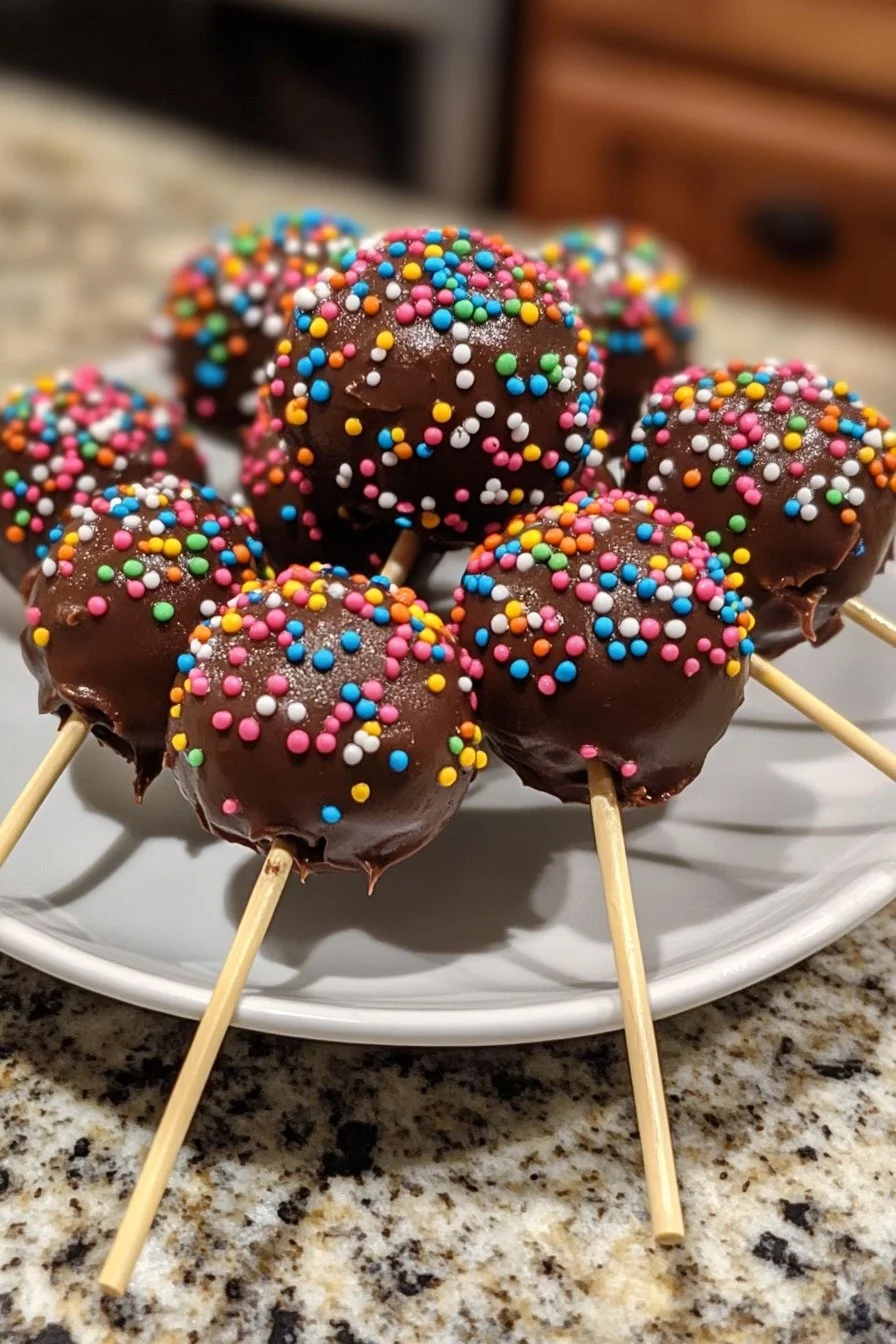
- Decorate with sprinkles if desired.
- Let the cake pops set on a styrofoam block or a tray until the chocolate hardens.
Techniques for Perfect Cake Pops
Technique
Perfect cake pops require a blend of precision and creativity. Understanding the melting point of your chocolate or candy melts can significantly impact your results. For example, avoid overheating; stop short of bubbling for a smooth finish.
Take your time when rolling the cake into balls. Well-formed balls help the pops maintain their shape during the coating process. Remember, practice makes perfect, so don’t rush—enjoy every step.
Tips and Tricks
Keep your cake pops from collapsing by ensuring they are cold before coating in chocolate. Refrigeration firms them up, making it easier to dip and decorate. Experiment with textures and flavours—try adding extracts or flavourings to the frosting before mixing.
Dip the lollipop stick in chocolate before inserting it into the cake ball. This step helps to secure the stick firmly inside—an important detail for enjoying your treat without mishaps.
Perfecting Results
Perfecting Results
Achieve flawless cake pops by taking care of every detail. Start with the cake’s consistency—too crumbly or wet affects the final product. Adjust your frosting to get the ideal texture. The right blend yields a great-tasting cake pop that holds together beautifully.
Use quality chocolate or candy melts; poor-quality products may not melt consistently or coat well. High-quality melts provide a smoother finish and better taste.
Troubleshooting and Variations
If your cake pops fall apart, consider how you’ve mixed the cake and frosting. The balance needs to be just right—too much frosting can make them overly moist. If the mixture feels too dry, add more frosting gradually until it reaches your desired consistency.
Feel free to alter your cake flavour using various cake mixes. Chocolate, vanilla, and even lemon offer exciting new tastes. Additionally, changing the type of candy melts can create unique flavours and colours, widening your creative horizon.
Serving and Presentation
Serving and Presentation
Present your homemade cake pops with flair. Use decorative trays or stands to show off their vibrant colours. Arrange them in groups for a visual feast that draws attention. The use of fun wrappers can elevate the presentation, making them perfect for parties.
Add sprinkles right after dipping while the chocolate is still wet. This simple step enhances the visual appeal, making each pop irresistible. Incorporate personal touches—consider matching colours to party themes or holidays.
Pairings and Storage
Couple your cake pops with beverages like milk or hot chocolate, creating a delightful treat combo. For storage, keep leftover cake pops in an airtight container in the fridge for up to five days. You can also freeze them for later enjoyment; just be sure to wrap them well to maintain freshness.
Enjoying these treats fresh boasts the best flavour, but batch-making allows for future fun. Perfect for unexpected guests, cake pops can be a lovely homemade delight ready to share.
Homemade cake pops offer a deliciously fun experience, perfect for any occasion. The simple yet satisfying process invites everyone into the kitchen to partake in the joy of making and eating. Whether tasting fresh chocolate-coated bites or admiring their beauty, homemade cake pops stand out as a beloved classic treat.

Homemade Cake Pops
Ingredients
Method
- Preheat your oven according to the cake mix instructions and prepare your baking pan.
- Mix the cake ingredients as per the box instructions and bake the cake.
- Allow the cake to cool completely before handling.
- Crumble the cooled cake into a large bowl.
- Add the frosting to the crumbled cake and mix until combined.
- Scoop out portions of the mixture and roll them into balls.
- Insert lollipop sticks into the balls and refrigerate for at least 1 hour.
- Melt the chocolate or candy melts in the microwave.
- Dip each cake pop into the melted chocolate, allowing excess to drip off.
- Decorate with sprinkles if desired.
- Let the cake pops set on a styrofoam block or a tray until the chocolate hardens.