
📑 Table of Contents ▶
Ice Cream Cone Cake Pops
Welcome to Eatimi! I’m Olivia Hart — a home-cook who believes delicious food doesn’t need complicated techniques. Here I share easy everyday recipes, family meals, quick ideas for busy days and helpful kitchen tips to make cooking simple and fun. My goal is to help you feel confident in the kitchen and enjoy homemade food with joy, comfort and love. 💛
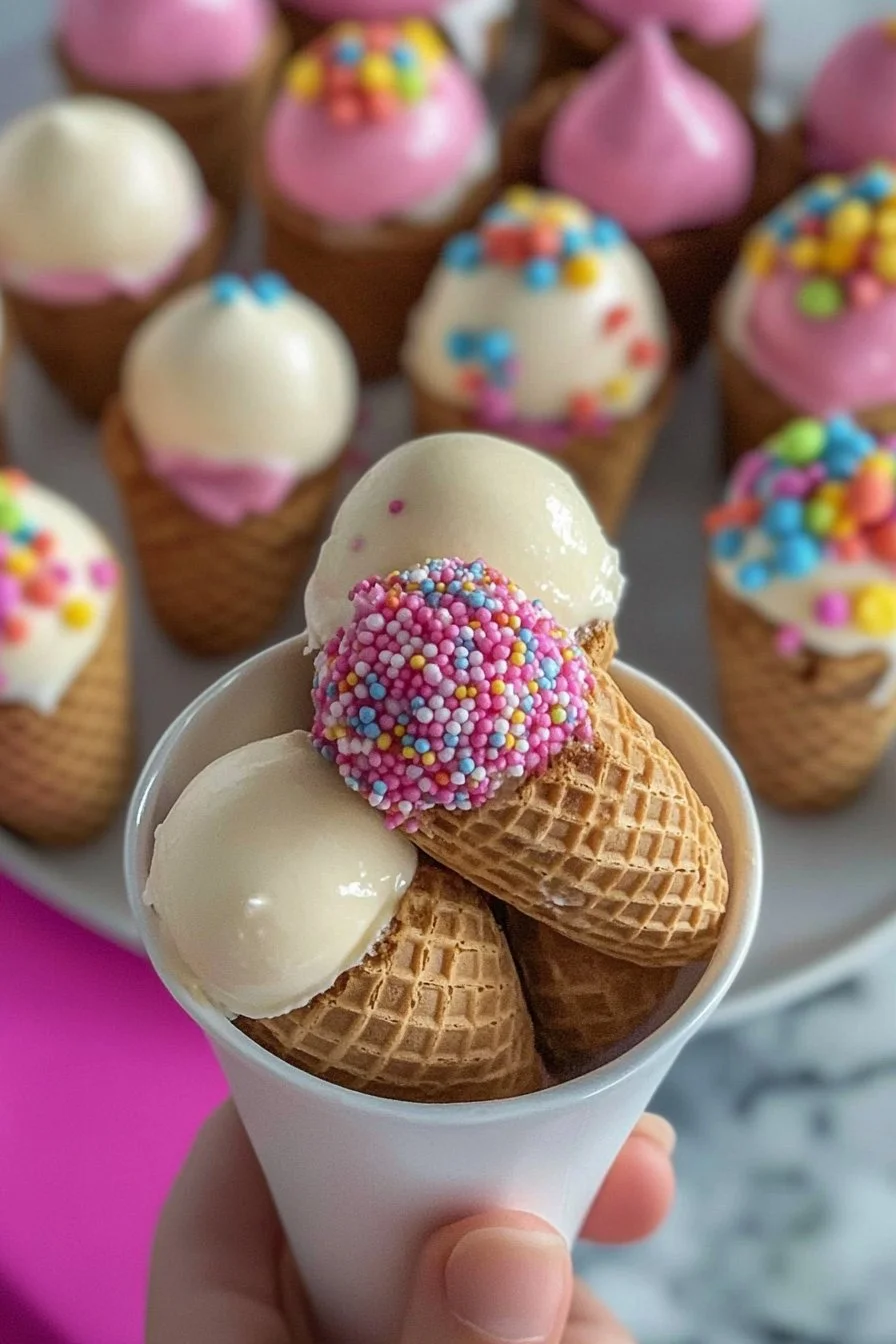
Creating sweet treats can transport you back to childhood in an instant. The moment I decided to make Ice Cream Cone Cake Pops, I felt an overwhelming excitement bubble up inside me as I envisioned the fun flavours and colours. These delightful creations become the star of any gathering, whether it’s a kids’ birthday party or just a casual Saturday at home.
The joy of assembling adorable cake pops using donut holes and vibrant candy melts brings a smile to my face. The beautiful colours and playful presentation create an irresistible dessert that never fails to impress. Each bite feels like a celebration, and those who share in the moment leave with happy memories.
If you want to bring some fun into your dessert time, making Ice Cream Cone Cake Pops represents the ultimate festive treat. Easy to make and delicious to eat, these cake pops combine the best of both worlds — a creamy center enrobed in colourful candy. Let’s dive into how to whip up these joyful treats!
Ice Cream Cone Cake Pops
Fundamentals
Making Ice Cream Cone Cake Pops starts with the basics — gathering your ingredients and preparing your space. You’ll need donut holes, various coloured candy melts, lollipop sticks, ice cream cone molds, sprinkles, and white chocolate for that elegant drizzle. Each element contributes to the fun vibe these treats bring to any occasion.
The donut holes form the base, providing a sweet bite that complements the colourful candy coating perfectly. Candy melts come in various hues, allowing you to design a fun and festive look. The lollipop sticks create an easy handle for the pops, making them a treat people can enjoy on-the-go.
Once assembled, these cake pops take on the appearance of cute little ice cream cones. Thanks to their delightful design, they appeal to both kids and adults. Perfect for celebrations or just a little treat at home, these pops become a guaranteed hit.
Preparation/setup
Before starting, prepare your workspace to ensure a smooth process. Lay out all your ingredients and tools on a clean surface for easy access. Defrosting the donut holes may be necessary if they come frozen. Pat them dry to ensure better adhesion when coating them later.
Next, gather your bowls for melting the candy melts. Use separate bowls for each colour to enhance the visual appeal of your Ice Cream Cone Cake Pops. Additionally, you may want to set up your ice cream cone molds ahead of time to keep the assembly process streamlined.
Once your space is ready, it’s time to melt those candy melts. Follow the instructions on the packaging to ensure they melt smoothly and evenly, providing a perfect coating for your donut holes.
Ingredients
- Donut holes
- Candy melts (various colours)
- Ice cream cone molds
- Sprinkles
- Lollipop sticks
- White chocolate (for drizzling)
Directions
- Melt the candy melts in separate bowls for different colours.
- Dip the tips of the lollipop sticks into the melted candy and insert them into the donut holes. Let them set until firm.
- Dip each donut hole in the melted candy to coat completely, then place in ice cream cone molds.
- Add sprinkles while the candy is still wet.
- Once set, drizzle with melted white chocolate and allow to harden.
- Serve and enjoy your adorable ice cream cone cake pops!
Whimsical Cake Pops
Technique
Mastering the technique for making Ice Cream Cone Cake Pops can greatly enhance the enjoyment of crafting these delightful treats. Focus on the candy melt dipping process for even coverage of the donut holes. A slow, steady dip provides a smooth finish and vibrant colour.
It’s paramount to let the candy melts set properly on the donut holes before proceeding. This ensures that the lollipop sticks hold firmly, making them easier to handle. Once dipped and set, the sprinkles can stick more effectively, adding that fun touch.
As you follow the steps, consider experimenting with layering colours or patterns in the candy melts to create unique designs. Just pour a few colours into the same bowl and swirl gently before dipping, yielding a vibrant and fun effect.
Tips/tricks
To achieve the best results, employ a few helpful tips during the process. Ensure your working environment remains clutter-free for precise dipping and coating activities. Also, let the candy melts cool slightly before dipping the donuts—this prevents runoff and creates a more appealing appearance.
Try to decorate the candy coating immediately after dipping while it’s still wet. This allows the sprinkles to adhere better, resulting in a stunning presentation. Moreover, using a variety of sprinkles, from colourful jimmies to fun shapes, can add an extra layer of excitement and whimsy.
Perfecting Results
Getting your Ice Cream Cone Cake Pops just right requires some attention to detail. Adjusting the temperature of your candy melts is crucial. If they become too hot, they may become too thin, leading to unwanted drips. The ideal melting temperature allows for a smooth coating that adheres perfectly without making a mess.
If you prefer thicker coatings, dip the donut holes twice, allowing the first coat to set slightly before repeating. This gives you a sturdier shell and a more vibrant display.
Troubleshooting/variations
If you encounter problems during the assembly process, don’t worry; solutions are often simple. For instance, if the chocolate doesn’t stick to the donut holes, ensure they aren’t too cold or moist. Dry them off thoroughly and make sure the melted candy isn’t too hot.
For variations, consider adding flavour elements to the candy melts, such as almond or vanilla extract. It can elevate the taste while maintaining the eye-catching colours. Alternatively, swap out the donut holes for cake balls or brownies for a different texture and flavour experience.
Presentation and Storage
Serving/presentation
The final presentation of Ice Cream Cone Cake Pops truly defines their charm. Display them in a fun, festive way using a styrofoam block or a decorated tray. Place them upright as if they are actual ice cream cones; this will showcase their whimsical nature.
Feel free to get creative with your presentation. Use cookie trays covered in colourful paper or drizzle additional chocolate over the entire display. The sprinkles can also have variations; bright colours can add a festive touch.
Pairings/storage
Storage of these delightful treats is straightforward. Keep your Ice Cream Cone Cake Pops chill in the fridge to maintain their freshness. For best results, store them in an airtight container to prevent them from becoming dry or sticky.
If you want to keep some for later, these treats freeze well too. Just wrap each pop individually, and they can last for a few months. However, always consider that fresh pops taste better and are much more enjoyable when shared with family and friends.
Creating these delightful Ice Cream Cone Cake Pops enters you into a world of colour and creativity that promises a fun baking experience. The end result is more than just a treat; it becomes a showcase of your culinary talent and artistic expression. Enjoy the process and let your creativity shine!

Ice Cream Cone Cake Pops
Ingredients
Method
- Prepare your workspace by laying out all your ingredients and tools on a clean surface.
- If your donut holes are frozen, defrost them and pat them dry.
- Set up bowls for melting the candy melts, using separate bowls for each color.
- Melt the candy melts according to the package instructions until smooth.
- Dip the tips of the lollipop sticks into the melted candy and insert them into the donut holes. Let them set until firm.
- Dip each donut hole in the melted candy to coat completely, then place in ice cream cone molds.
- Add sprinkles while the candy is still wet.
- Once set, drizzle with melted white chocolate and allow to harden.
- Serve and enjoy your adorable ice cream cone cake pops!