
📑 Table of Contents ▶
Juicy Red Velvet Cake Pops
Welcome to Eatimi! I’m Olivia Hart — a home-cook who believes delicious food doesn’t need complicated techniques. Here I share easy everyday recipes, family meals, quick ideas for busy days, and helpful kitchen tips to make cooking simple and fun. My goal is to help you feel confident in the kitchen and enjoy homemade food with joy, comfort, and love. 💛
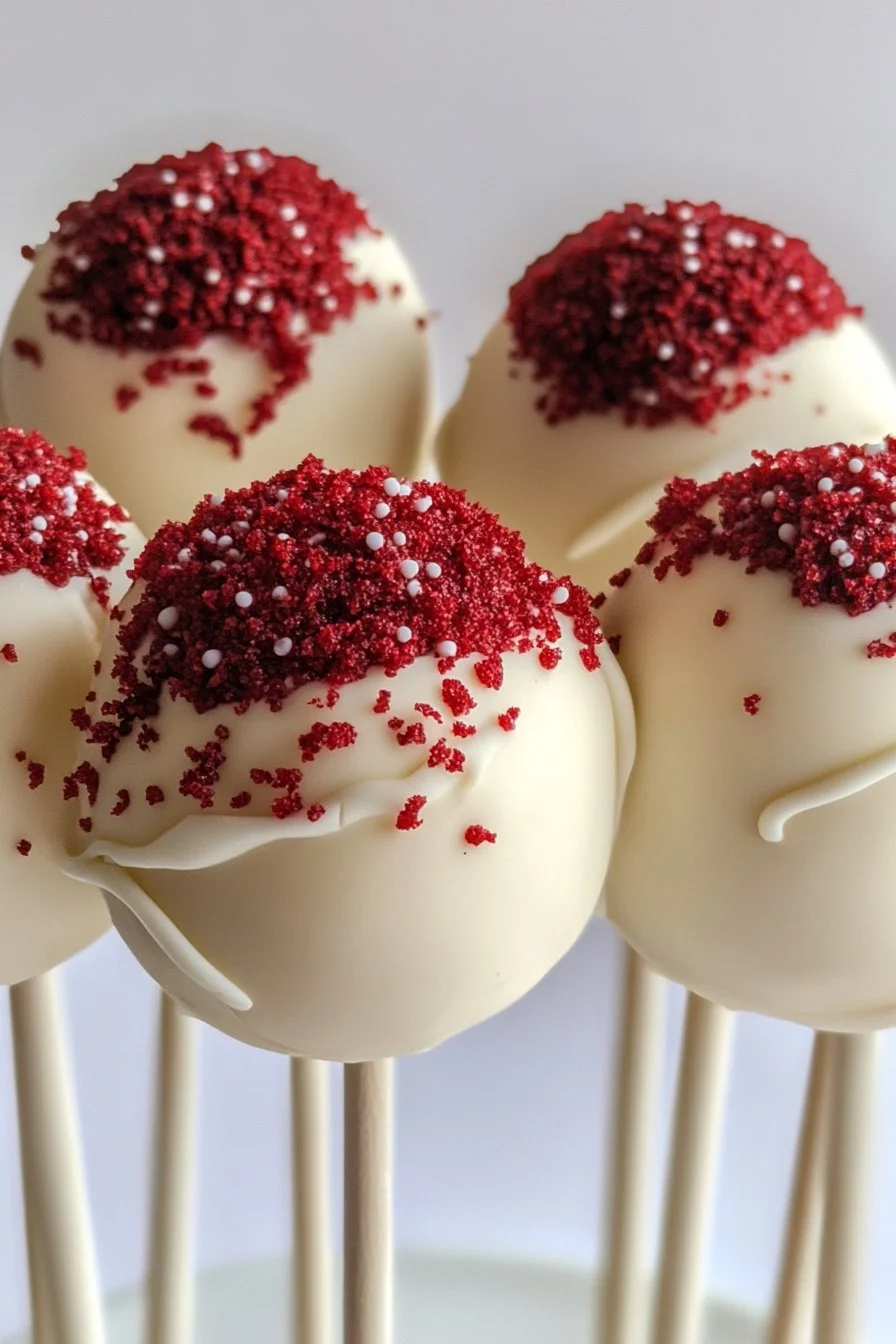
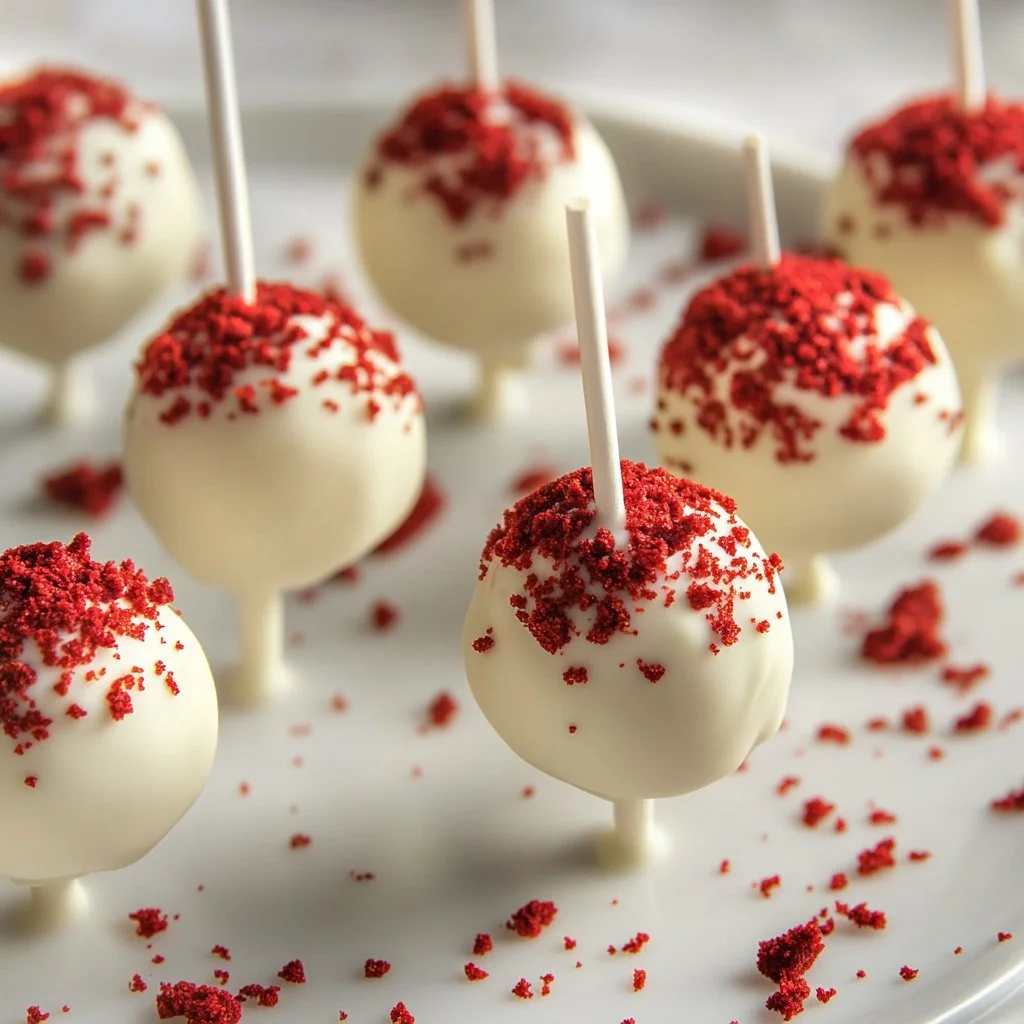
A memory comes to mind, filled with vibrant laughter and sweet indulgence. Family gatherings often featured a dessert centerpiece that dazzled every eye. The undeniable charm of red velvet cake never failed to steal the show. Everyone admired its striking colour and rich, velvety texture. These juicy red velvet cake pops will rekindle that vibrant spirit, bringing a little bit of sparkle to your dessert table.
In this delightful recipe, the joy of red velvet cake transforms into bite-sized indulgences that captivate anyone who takes a bite. With each pop, you experience fluffy cake combined with creamy frosting. Dip these delectable morsels in chocolate coating, and voilà! You have a treat that dazzles in taste and appearance.
Let’s incorporate the magic of red velvet cake into something fun and shareable. Perfect for parties or casual gatherings, these juicy red velvet cake pops will make everyone smile. Let’s dive into the wonderful world of cake pops!
Juicy Red Velvet Cake Pops
Fundamentals
Creating juicy red velvet cake pops starts with understanding the core elements of the recipe. The cake mix we use forms the foundation, allowing for that quintessential red velvet flavour. While you could make the cake from scratch, the box mix simplifies this process immensely, making it accessible for everyone.
The richness of eggs and vegetable oil ensures each bite remains moist and tender. Water binds the ingredients together, helping them blend seamlessly. Once baked, the cake crumbles into fine pieces, ready to merge with the cream cheese mixture.
Cream cheese brings a luscious creaminess that pairs perfectly with red velvet’s subtle cocoa notes. Combined with powdered sugar and vanilla extract, it forms an irresistible frosting-like blend. This mixture tightly envelops the crumbled cake, creating a rich, juicy ball of flavour. The balance of sweetness is crucial, ensuring it doesn’t overshadow the beautiful cocoa-red velvet base.
Preparation/setup
To begin, preheat your oven according to the instructions provided on the cake mix box. This crucial first step ensures that your cake rises perfectly and achieves that desired fluffy texture. Take the time to prepare your baking area by gathering all the ingredients you need.
Follow the cake mix directions closely. In a large mixing bowl, combine the red velvet cake mix, three large eggs, one cup of vegetable oil, and one cup of water. Mixing these ingredients well will create a decadent batter full of flavour.
Once you pour the batter into a greased baking pan, place it in the oven. Bake for the recommended amount of time, checking for doneness with a toothpick. Allow it to cool completely before crumbling it into a large bowl. The cooling process is vital to prevent the cake from falling apart too easily when mixed with the cream cheese mixture.
Ingredients
To make these juicy red velvet cake pops, gather the following ingredients:
- 1 box red velvet cake mix
- 3 large eggs
- 1 cup vegetable oil
- 1 cup water
- 8 oz cream cheese (softened)
- 1 cup powdered sugar
- 1 tsp vanilla extract
- 12 oz chocolate coating or candy melts
- Cake pop sticks
- Optional: Sprinkles for decoration
With these ingredients, you’re well on your way to crafting delicious cake pops that are perfect for any occasion.
Directions
Start by preheating your oven according to the baking instructions on the cake mix box. Prepare the red velvet cake mix as per the package directions by mixing the cake mix, eggs, oil, and water together. Bake the cake for the recommended amount of time. Once baked, allow it to cool completely.
After cooling, crumble the cake into a large bowl. In a separate bowl, mix the softened cream cheese, powdered sugar, and vanilla extract until smooth. Combine this cream cheese mixture with the crumbled cake and mix until well blended.
Scoop out small portions of the mixture and roll them into balls. Place the formed balls on a baking sheet and chill them in the refrigerator for about 30 minutes.
Meanwhile, melt the chocolate coating or candy melts according to the package instructions. Dip the end of each cake pop stick into the melted chocolate for a strong hold, then insert it into each cake pop ball.
Next, dip each cake pop into the melted chocolate until coated. Let any excess chocolate drip off before placing them back on the baking sheet. If you wish, sprinkle decorations on top while the chocolate is still wet. Allow the pops to set completely before serving.
Crafting the Perfect Juicy Red Velvet Cake Pops
Technique
Mastering juicy red velvet cake pops includes honing your technique to achieve an ideal texture. Maintaining the right moisture levels in both the cake and the cream cheese mixture is essential. Ensure that your cream cheese is adequately softened; if it’s too cold, it won’t blend smoothly with the powdered sugar.
When rolling the mixture into balls, keep them uniform in size. This ensures even coating and consistent baking times. Use a small cookie scoop to measure portions, resulting in uniform cake pops.
Chilling the rolled cake balls is crucial. This step solidifies them, making it easier to dip them into the melted chocolate without losing shape. The chocolate coating provides not only flavour but also a crisp shell that contrasts beautifully with the soft cake.
Tips and Tricks
Getting the most out of your cake pops means following a few simple tips. When melting chocolate, do so gradually to avoid burning. A microwave works well, but ensure to stir frequently.
Consider adding flavour extracts to the melted chocolate for added depth. Almond, peppermint, or even orange extract can elevate the taste experience. Also, if using sprinkles, be quick; they adhere best when the chocolate is not fully set.
Clean your stick before dipping into the melted chocolate to avoid gummy remnants. Another helpful trick is to use a styrofoam block to hold the pops upright while they set. This prevents any mess and allows the chocolate to harden evenly.
Enhancing Juicy Red Velvet Cake Pops
Perfecting Results
Success lies in perfecting your red velvet cake pops. The right consistency in the cake and cream cheese mixture is essential. If the mixture seems too dry, consider adding a touch more cream cheese or a splash of milk. This can create that juicy texture we’re aiming for.
Another aspect to consider is baking time. Overbaking can lead to dry cake, impacting the overall juiciness of the cake pop. A toothpick inserted in the centre should come out clean but not dry to the touch.
Experiment with the quantity of frosting mixture. If you prefer a sweeter cake pop, add more powdered sugar to the cream cheese blend. For a more subtle sweetness, you can adjust the amounts.
Troubleshooting Variations
Sometimes, things won’t go as planned. If your cake pops fall off the stick during dipping, it may be due to the cake ball being too cold or too warm. Finding that happy medium is crucial for successful dipping.
For those wanting to stray from classic red velvet, consider adding fun variations. Mixing in mini chocolate chips or nuts can add texture. You could also divide the mixture and create different flavours by adding cocoa powder or even fruit purees.
If you’re looking for an alternative coating, try white chocolate or even a colourful candy melt for a vibrant twist. The world of cake pops is open to creative interpretations, so don’t hesitate to explore!
Serving Your Juicy Red Velvet Cake Pops
Presentation
Presenting your juicy red velvet cake pops can turn an everyday treat into a show-stopping dessert. Simple but effective; arrange them vertically using a cake pop stand or display them on decorative trays.
Add a touch of flair with vibrant sprinkles, edible glitter, or drizzled chocolate. Dipping half the cake pop in white chocolate creates a striking contrast against the red. This visual appeal can make an ordinary dessert extraordinary.
To add more personal charm, consider wrapping each cake pop in a small clear plastic bag, tying it with a ribbon. This simple gesture transforms ordinary pops into delightful party favours.
Pairings and Storage
Pair these juicy red velvet cake pops with rich coffee or a light tea for a perfect afternoon treat. They also complement a scoop of ice cream for an indulgent dessert experience. Serve them alongside fruit, like strawberries, to create a fresh balance.
For storage, keep your cake pops in an airtight container to maintain freshness. They last up to a week in the fridge. If you wish to freeze them, place them in a single layer on a baking tray until frozen solid, then transfer them to a container or freezer bag.
These juicy red velvet cake pops bring joy to any occasion, bursting with flavour and charm.
Juicy red velvet cake pops are not just desserts; they represent happiness in small, adorable bites.
Juicy Red Velvet Cake Pops
Ingredients
Method
- Preheat your oven according to the instructions provided on the cake mix box.
- In a large mixing bowl, combine the red velvet cake mix, eggs, vegetable oil, and water, then mix well.
- Pour the batter into a greased baking pan and bake for the recommended time, checking with a toothpick for doneness.
- Allow the cake to cool completely before crumbling into a large bowl.
- In a separate bowl, mix the softened cream cheese, powdered sugar, and vanilla extract until smooth.
- Combine this cream cheese mixture with the crumbled cake and mix until well blended.
- Scoop out small portions and roll them into balls, placing them on a baking sheet.
- Chill the formed balls in the refrigerator for about 30 minutes.
- Melt the chocolate coating or candy melts according to package instructions.
- Dip the end of each cake pop stick into the melted chocolate, then insert it into each cake pop ball.
- Dip each cake pop into the melted chocolate until completely coated and let excess chocolate drip off.
- Sprinkle decorations on top while the chocolate is still wet, if desired.
- Allow the pops to set completely before serving.