
📑 Table of Contents ▶
Sourdough Bread
Welcome to Eatimi! I’m Olivia Hart — a home-cook who believes delicious food doesn’t need complicated techniques. Here I share easy everyday recipes, family meals, quick ideas for busy days, and helpful kitchen tips to make cooking simple and fun. My goal is to help you feel confident in the kitchen and enjoy homemade food with joy, comfort and love. 💛
Nothing quite captures the essence of home like the aroma of freshly baked sourdough bread wafting through the kitchen. It brings back memories of my grandmother kneading dough every Sunday, filling her home with warmth and comfort. That simple act of bread-making is a labour of love that creates an experience beyond just eating.
Crafting sourdough bread is a uniquely satisfying journey. It’s all about patience, practice, and enjoying the process. Each loaf tells a story, infused with your effort and anticipation. Sourdough, with its tangy flavour and crusty exterior, elevates even the simplest meal. Embracing this art can transform your home into a haven of delightful smells and flavours.
With a few basic ingredients, you can create this staple at home. Follow along as we explore the world of sourdough bread, step-by-step, breaking it down into an accessible and enjoyable process that anyone can master.
Sourdough Bread – Fundamentals
Ingredients
To embark on your sourdough bread-making adventure, gather these key ingredients: 370g bread flour, 296g water, 93g sourdough starter, 1g instant yeast, 8g salt, and 12g extra virgin olive oil.
Each element plays a crucial role in the overall texture and flavour. The bread flour provides structure, the water hydrates the mix, while the sourdough starter and instant yeast aid in fermentation and rising. Salt and olive oil enhance flavour and contribute to the bread’s golden crust. These simple ingredients combine to create something truly remarkable.
Preparation/Setup
Start your sourdough journey by preparing a large mixing bowl. Measure all the dry ingredients into the bowl: the bread flour and salt. Then, in a separate container, combine the water and the sourdough starter. Mix them well until fully integrated.
Pour the wet mixture into the bowl with the flour and salt, then incorporate the instant yeast. Mix until a rough dough forms. This first step marks the beginning of a beautiful transformation. Your hands may feel slightly sticky, but that’s perfectly normal—a sign that the dough is absorbing moisture.
Directions
Knead the rough dough on a lightly floured surface for about 10 minutes. Use the palms of your hands to push and fold the dough until it becomes smooth and elastic. This crucial step develops gluten, the protein that gives bread its structure.
Once the dough reaches the desired consistency, incorporate the extra virgin olive oil. Knead the dough again until the oil fully absorbs. This not only enriches the dough but also enhances the final flavour of your sourdough bread.
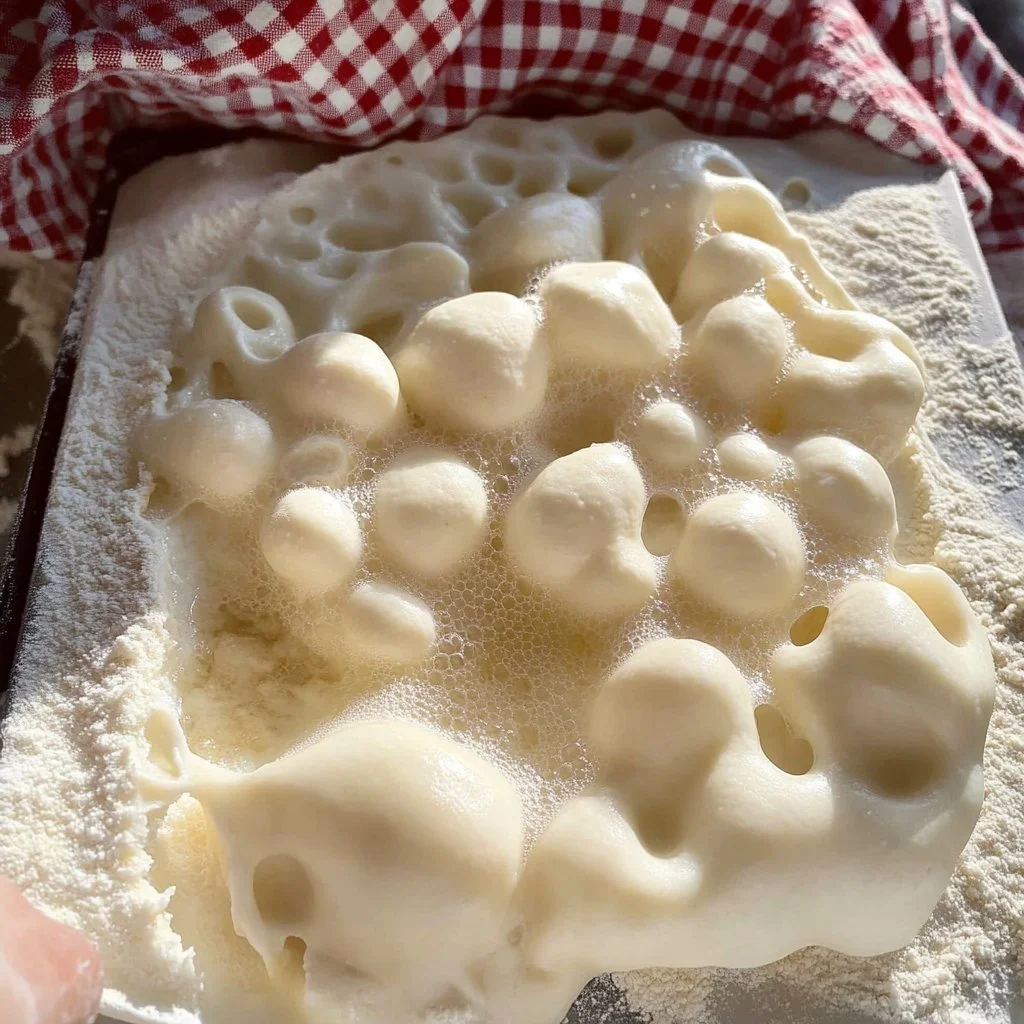
Place the kneaded dough in a greased bowl, cover it with a damp cloth, and allow it to rise at room temperature. Plan for approximately 4 to 6 hours, or until it doubles in size. The waiting can feel long, but this is the time for the dough to ferment and develop wonderful flavours.
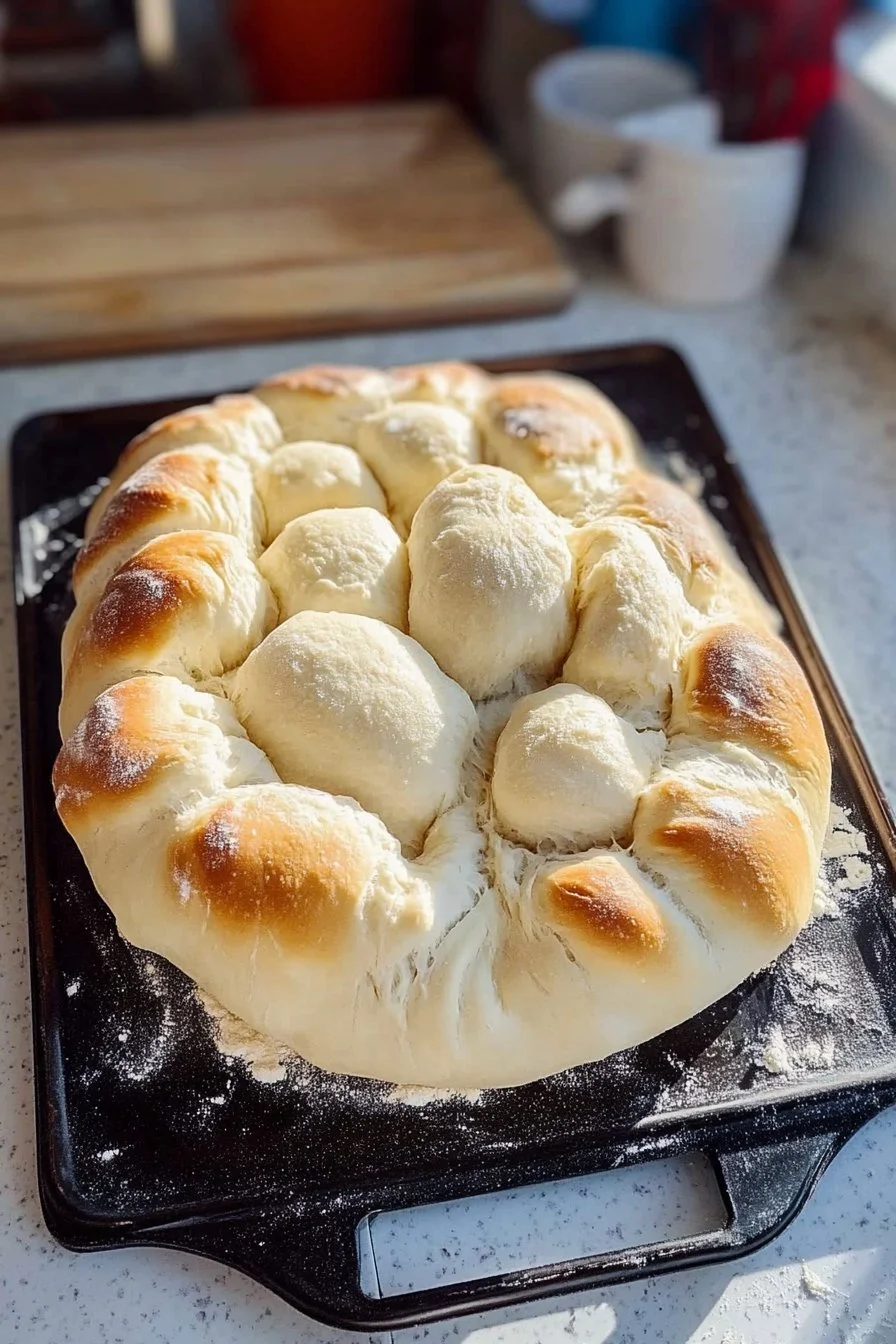
Gently deflate the dough once it has fully risen. Shape it into either a loaf or round shape, depending on your preference. Use a proofing basket to assist with shaping and to provide structure during the second rise. Let the dough rise for another hour to achieve that perfect texture.
During this time, preheat your oven to 450°F (232°C) with a Dutch oven inside. The Dutch oven creates a steamy environment that promotes a beautiful crust. When your oven reaches the desired temperature, carefully transfer the dough into the hot Dutch oven. Cover and bake for 30 minutes.
Finally, remove the lid and continue baking for an additional 15 to 20 minutes. You will see the beautiful golden brown crust form. Once out of the oven, cool the bread on a wire rack before slicing. This simple process yields delicious sourdough bread worthy of any meal.
Crafting Sourdough – Technique
Technique
Creating tasty sourdough bread involves understanding the fermentation process. Time and temperature play vital roles. Adjusting these factors can yield different textures and flavours. Colder conditions may extend fermentation, while warmer environments quicken the process.
After the first rise, pay attention to how the dough responds. If it feels too slack, it might need more flour, whereas a tight texture may benefit from more hydration. It’s all about finding the right balance and making adjustments based on your observations and preferences.
Tips/Tricks
To achieve the best results, keep these tips in mind. First, always work with a well-fed sourdough starter for maximum effectiveness. This ensures that your bread rises adequately and develops that signature sour flavour.
Consider the humidity and temperature of your kitchen; adjust flour and water slightly as needed. A damp environment will require less hydration, while a dry one might need slight increases. Practice makes perfect—embrace experimenting to find your ideal recipe.
Using a kitchen scale will enhance accuracy when measuring ingredients. Consistency will lead to consistency in your baking. Also, remember to allow the sourdough to cool completely before slicing. This helps maintain moisture and creates those perfect slices for sandwiches or toast.
Perfecting Sourdough – Troubleshooting
Perfecting Results
Even seasoned bakers encounter setbacks sometimes. Common pitfalls include dense bread, insufficient rise, or lack of flavour. Identify the issue to make adjustments for future bakes. For dense bread, consider lengthening the fermentation time or checking sourdough starter activity.
For a better rise, try different folding techniques to help create air pockets. Monitor your baking time; slight changes can yield significant improvements. Understanding your oven’s specifics can help refine your results.
Troubleshooting/Variations
Should you experience any issues with texture or flavour, reflect on the fermentation process. Consider whether the dough has sufficient time to rise. Experimenting with different flours may yield unexpected yet delightful results. Whole wheat flour can add depth, while rye flour has a unique taste profile.
Adjusting hydration levels slightly can also enhance your sourdough bread. Each minor tweak can create variations worth exploring. Always keep notes on your experiences. This way, you can refine your recipe tailored to your taste.
Serving Sourdough – Presentation
Serving/Pairs
When serving your freshly baked sourdough bread, consider how to showcase its rustic beauty. Slice it thick for sandwiches or thin for a bruschetta base. It pairs well with creamy spreads, olives, and hearty soups. Imagine a warm slice with a simple layer of butter melting into it—ultimate comfort.
Bringing out the contrast in texture will elevate meal presentations. Evergreen herbs scattered on the bread while plated create an inviting display. Consider garnishing with olive oil drizzles or a sprinkle of sea salt for a finishing touch.
Storage
Once cooled, proper storage ensures your sourdough remains delightful for days. Keep the bread in a paper bag at room temperature for up to three days. If you wish to store it longer, slice and place it in a plastic bag or airtight container in the freezer. It retains its flavour and freshness for up to a month.
Reheat slices individually in the toaster for a perfect warm treat. Alternatively, wrap whole loaves in foil and warm in the oven. Nothing beats the warmth and crispness of fresh sourdough.
Mastering sourdough bread opens doors to endless possibilities in your baking journey. Perfect your techniques with love and patience as you create bread that nourishes both body and soul.
Sourdough Bread
Ingredients
Method
- Prepare a large mixing bowl and measure all the dry ingredients: bread flour and salt.
- In a separate container, combine the water and the sourdough starter, mixing well.
- Pour the wet mixture into the bowl with flour and salt, then incorporate the instant yeast. Mix until a rough dough forms.
- Knead the rough dough on a lightly floured surface for about 10 minutes until smooth and elastic.
- Incorporate the extra virgin olive oil and knead until absorbed.
- Place the kneaded dough in a greased bowl, cover with a damp cloth, and allow to rise for 4-6 hours or until doubled in size.
- Gently deflate the dough and shape it into a loaf or round shape.
- Let it rise in a proofing basket for another hour.
- Preheat the oven to 450°F (232°C) with a Dutch oven inside.
- Transfer the dough into the hot Dutch oven, cover, and bake for 30 minutes.
- Remove the lid and continue baking for an additional 15-20 minutes until golden brown.
- Cool on a wire rack before slicing.