
📑 Table of Contents ▶
- Understanding Christmas Cake Pops with Cake Mix
- Fundamentals
- Preparation/Setup
- Directions
- Creative Approaches to Cake Pops
- Technique
- Tips/Tricks
- Mastering the Art of Christmas Cake Pops
- Perfecting Results
- Troubleshooting/Variations
- Decorating and Serving Ideas for Cake Pops
- Serving/Presentation
- Pairings/Storage
- Christmas Cake Pops
- Ingredients
- Method
Christmas Cake Pops with Cake Mix
Welcome to Eatimi! I’m Olivia Hart — a home-cook who believes delicious food doesn’t need complicated techniques. Here I share easy everyday recipes, family meals, quick ideas for busy days, and helpful kitchen tips to make cooking simple and fun. My goal is to help you feel confident in the kitchen and enjoy homemade food with joy, comfort, and love. 💛
Baking during the festive season always awakens fond memories. Christmas cake pops bring back the joy of family gatherings filled with laughter, sharing stories, and, of course, indulging in delightful treats. These festive bites become the centrepiece of any holiday celebration, loved by both children and adults alike.
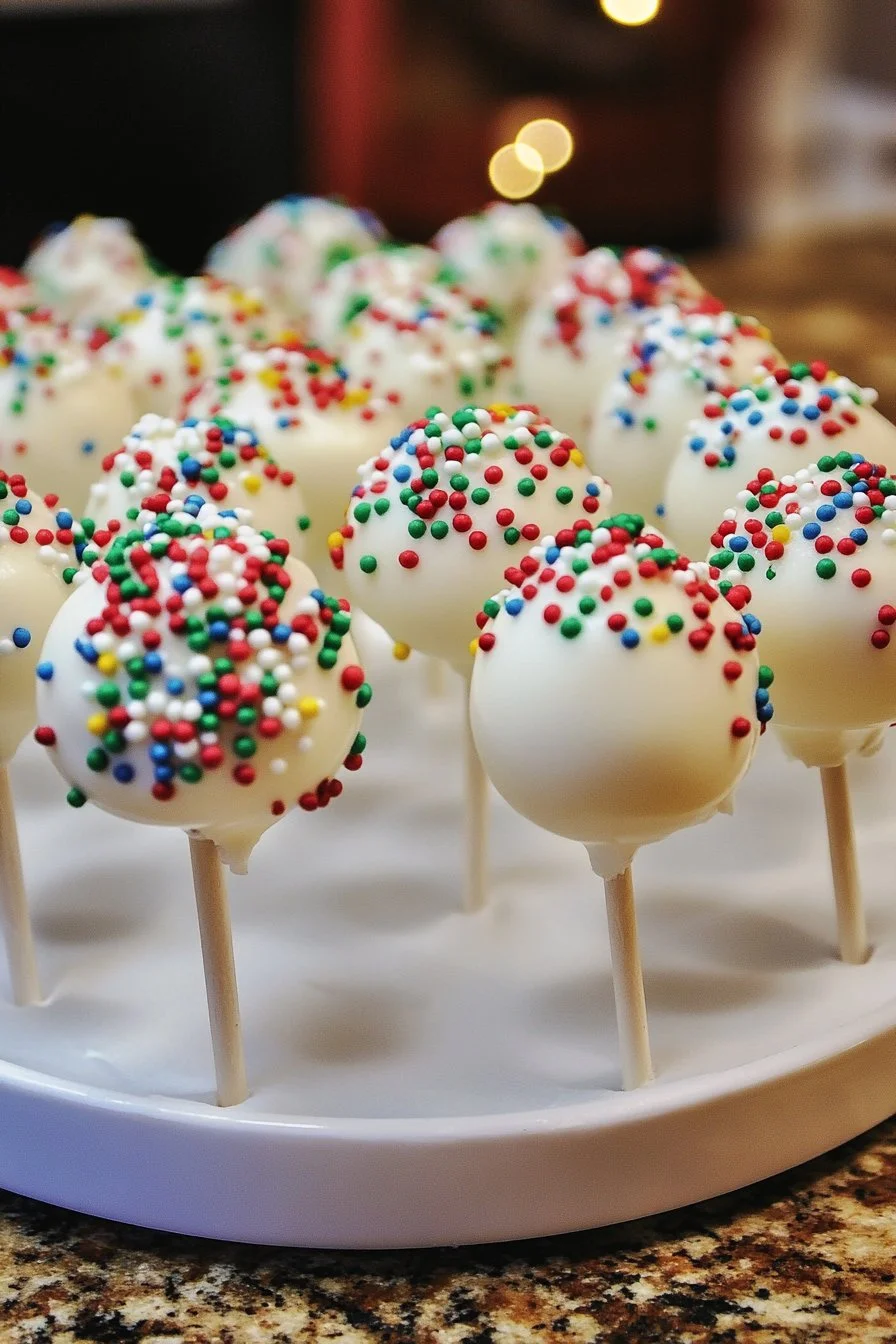
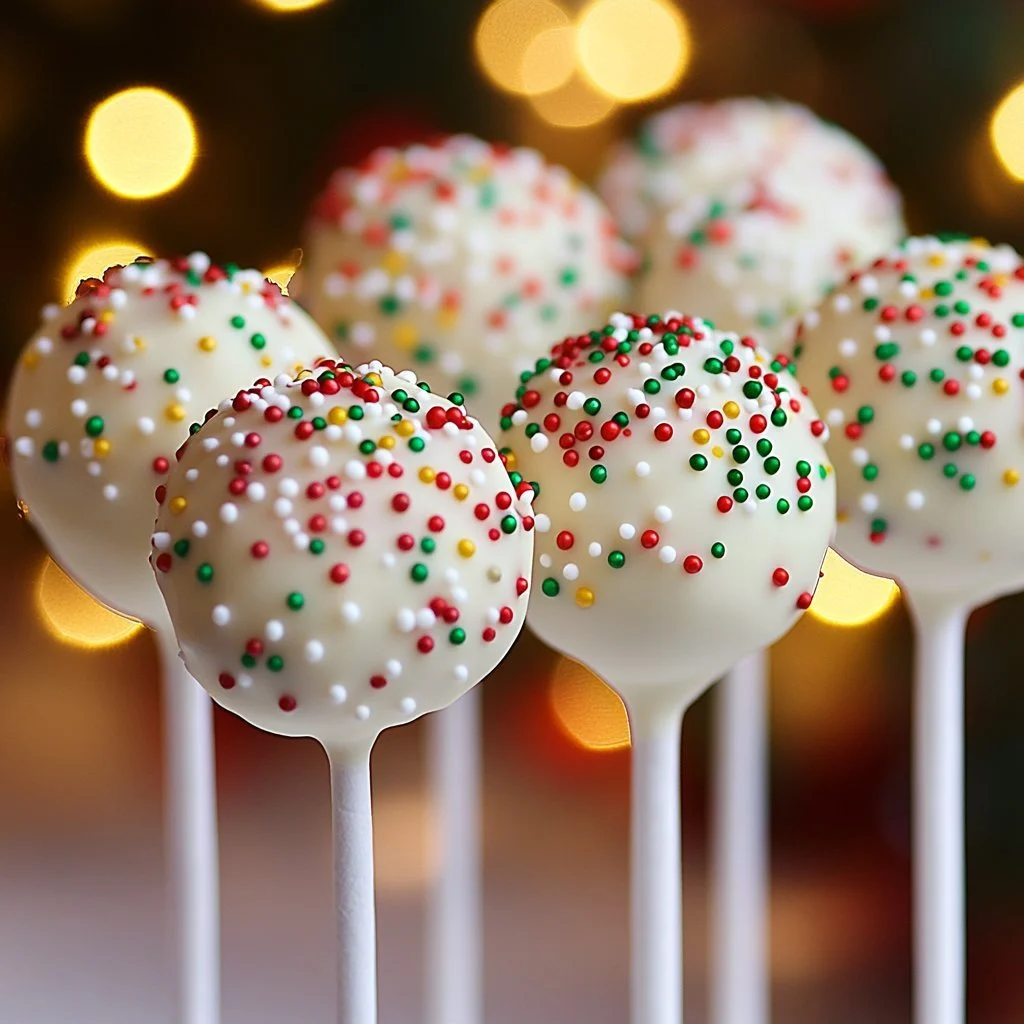
The charm of Christmas cake pops lies in their adorable appearance and delicious taste. Each pop is a tiny ball of cake, coated in smooth chocolate, and adorned with festive sprinkles. Beyond their delicious flavour, they offer a fun way to bring the family together in the kitchen, making holiday memories that last a lifetime.
Creating these Christmas cake pops with cake mix is incredibly simple. With just a few ingredients and minimal preparation, you can transform basic cake into magical creations that celebrate the season. Dive into this festive baking adventure and discover how easy it is to make these delightful goodies!
Understanding Christmas Cake Pops with Cake Mix
Fundamentals
Christmas cake pops are a perfect blend of cake and chocolate, decorated in a way that embodies the festive spirit. The cake mix serves as the base for these pops, providing a moist and flavourful interior. Using a box of super moist yellow cake mix streamlines the process, allowing you to focus on the fun aspects of cake pop making.
While the cake serves as the foundation, the cream cheese frosting binds the crumbs together, resulting in a smooth dough before the cake pops take shape. The coating of vanilla almond bark or white chocolate provides a deliciously sweet outer layer. This combination ensures that every bite offers a balance of moist cake and creamy goodness.
Preparation/Setup
Preparation is key when making Christmas cake pops with cake mix. Start by preheating your oven to 350°F (175°C), ensuring it’s ready for baking. Greasing your 9×13-inch baking sheet pan allows for a smooth cake release. This added step prevents any frustration when removing the baked cake, aiding in the overall presentation of your cake pops.
Gather all ingredients to streamline the process. Having everything on hand makes it easier to follow the steps without interruptions. Once the cake is baked, cooled, and crumbled, the real fun begins as you shape each cake ball and prepare them for decorating.
Ingredients
To craft these delightful Christmas cake pops, you will need:
- 1 box (13.25 oz) super moist yellow cake mix
- 3 large eggs
- ⅓ cup unflavored oil
- 1 cup water
- ½ cup cream cheese frosting
- 12 oz vanilla almond bark or white chocolate/candy melts
- 15 cake pop sticks
- Holiday sprinkles for decorating
These ingredients come together to create a treat that captures the essence of the holiday season — simple, festive, and utterly delicious.
Directions
Creating your Christmas cake pops involves a series of straightforward steps.
- Preheat your oven to 350°F (175°C).
- Grease a 9×13-inch baking sheet pan with cooking spray or line it with parchment paper.
- In a large bowl, mix the yellow cake mix, eggs, oil, and water until smooth, using a hand mixer or whisk for about 2 minutes.
- Pour the batter evenly into your prepared pan and bake for 25-28 minutes. Ensure that a toothpick inserted into the centre comes out clean for perfect doneness.
- After baking, cool the cake completely. Trim any brown edges for a clean surface, then crumble the cooled cake in a bowl.
- Incorporate the cream cheese frosting with the crumbled cake until it forms a dough-like consistency.
- Using an ice cream scoop, create golf ball-sized portions, rolling them into smooth balls. Place these on a plate and refrigerate for around 10 minutes.
- Melt the white chocolate or almond bark in a microwave-safe bowl in short intervals (20-30 seconds), stirring until smooth.
- Dip the tip of each cake pop stick in the melted chocolate, then insert it halfway into each cake pop to secure it.
- Chill again for about 10 minutes.
- Coat each cake pop in the melted chocolate and gently tap to remove any excess. Decorate with holiday sprinkles while the chocolate is still wet.
- Stick the cake pops upright in a foam block or similar surface until the chocolate hardens.
Creative Approaches to Cake Pops
Technique
Making Christmas cake pops with cake mix can be an enjoyable and creative process. The key lies in crafting perfect balls. Ensure that your cake and frosting mixture has the right consistency for easier shaping. If it’s too dry, add a bit more frosting until you can mold it without cracks.
While shaping, rolling the mixture in your hands creates a smooth pop. Chill the dough for a few minutes if it becomes too soft to handle. These little details ensure that your cake pops end up looking great and taste even better.
Tips/Tricks
To elevate your cake pops further, consider these handy tips. First, use colourful holiday sprinkles for decoration; they make your pops visually stunning and increase the festive charm. You can also experiment with different toppings like crushed candy canes or edible glitter for an added sparkly touch.
When melting the chocolate, continuous stirring is vital to achieve a silky smooth texture. If you notice it thickening, simply add a teaspoon of vegetable oil to loosen it up. For a fun twist, mix in flavours such as peppermint extract or almond extract into the melted chocolate; this adds an exciting dimension to your cake pops.
Mastering the Art of Christmas Cake Pops
Perfecting Results
Perfection requires practice, especially when it comes to creating cake pops. If you find the coating runs or drips, ensure the cake pops are cool before dipping. If your cake pops are too warm, the coating will melt and hold fewer decorative touches.
Let the cake pops rest after decorating; this solidifies the chocolate into a sturdy coating. The chilling and setting time plays a crucial role in the final texture of your treats.
Troubleshooting/Variations
In baking, issues may arise, and cake pops are no exception. If your pops fall apart during wax paper removal, it indicates that they were either too warm or too moist. Maintain a balance in cookie dough consistency by checking the added frosting amount for the dough.
For lavender cake pops, consider adding food-safe flavouring. You can infuse different tastes into your cake mix, such as orange or lemon zest, enhancing the pops with a refreshing twist. It’s all about creativity, so feel free to experiment with flavours that resonate with you.
Decorating and Serving Ideas for Cake Pops
Serving/Presentation
Presenting Christmas cake pops beautifully can make a significant difference at your gatherings. Arrange them in a decorative container filled with festive décor, such as cranberries, shredded coconut, or grass for a seasonal touch. Alternately, displaying them upright in a foam block adds an eye-catching appeal to holiday tables.
Consider offering small bags or boxes for guests to take home. This thoughtful gesture adds a personal touch, allowing everyone to enjoy your delicious treats long after the gathering ends.
Pairings/Storage
While cake pops are a delightful treat on their own, they pair wonderfully with hot beverages like hot chocolate or spiced cider. For those non-sweet moments, they can also complement a cheese platter or fresh fruit spread, striking a balance between sweet and savoury flavours.
To keep your cake pops fresh, store them in an airtight container at room temperature for a few days. For longer storage, refrigerate them to maintain their scrumptiousness. To maintain their beautiful appearance, stack them carefully so that they do not get squished.
Creating Christmas cake pops with cake mix is an enjoyable process that brings joy to both the baker and the indulger. The simplicity of the recipe paired with the opportunity for creative expression makes these treats a beloved activity during holiday festivities. With a bit of practise, anyone can master the art of cake pops. Embrace your time in the kitchen, celebrate the season, and spread joy with these festive, delicious treats.
Christmas Cake Pops
Ingredients
Method
- Preheat your oven to 350°F (175°C).
- Grease a 9x13-inch baking sheet pan with cooking spray or line it with parchment paper.
- In a large bowl, mix the yellow cake mix, eggs, oil, and water until smooth, using a hand mixer or whisk for about 2 minutes.
- Pour the batter evenly into your prepared pan and bake for 25-28 minutes. Ensure that a toothpick inserted into the centre comes out clean.
- After baking, cool the cake completely. Trim any brown edges for a clean surface, then crumble the cooled cake in a bowl.
- Incorporate the cream cheese frosting with the crumbled cake until it forms a dough-like consistency.
- Using an ice cream scoop, create golf ball-sized portions, rolling them into smooth balls. Place these on a plate and refrigerate for around 10 minutes.
- Melt the white chocolate or almond bark in a microwave-safe bowl in short intervals (20-30 seconds), stirring until smooth.
- Dip the tip of each cake pop stick in the melted chocolate, then insert it halfway into each cake pop to secure it.
- Chill again for about 10 minutes.
- Coat each cake pop in the melted chocolate and gently tap to remove any excess. Decorate with holiday sprinkles while the chocolate is still wet.
- Stick the cake pops upright in a foam block or similar surface until the chocolate hardens.