
📑 Table of Contents ▶
Halloween Cake Pops
Baking has always been a delightful adventure, especially during Halloween. I remember the first time I made Halloween cake pops with my friends: we were knee-deep in sprinkles and laughter, trying to make the spookiest treats. The kitchen turned into our haunted house, filled with the sweet aroma of cake mix and melting chocolate. Halloween cake pops quickly became our go-to treat, bridging creativity and taste beautifully.
The great part about Halloween cake pops is the creativity. You can transform simple ingredients into ghastly goodies, perfect for a party or a fun afternoon snack. These cake pops capture that festive spirit, making everyone smile with their fun designs and delicious flavours.
Utilising a boxed cake mix allows for quick preparation, so even novice bakers can join in on the fun. Whether you prefer classic vanilla or rich chocolate, the possibilities are endless. By adding ooey-gooey frosting and vibrant decorations, you can create show-stopping cake pops that everyone will adore.
Creating Halloween cake pops engages the inner child in all of us, providing an exciting way to celebrate the spooky season. With just a handful of ingredients, you can whip up these indulgent treats that will cast a spell on your taste buds.
The Basics of Halloween Cake Pops
Fundamentals
At the heart of Halloween cake pops lies the simple yet satisfying process of transforming cake into delightful bites. Cake pops require a delicate balance of baking, mixing, and decorating, making each step essential to the final product. The fundamentals begin with choosing your flavour of cake mix, setting the stage for your creative masterpiece.
The texture of the cake contributes significantly to the outcome of your Halloween cake pops. You want a cake that crumbles easily, allowing for perfect blending with frosting. The choice of frosting also matters, with cream cheese or chocolate capable of adding moisture and flavour to your cake mixture.
Understanding the right ratios is crucial, especially when blending cake and frosting. Achieving the perfect consistency ensures your cake balls hold their shape when it’s time for dipping. The blend should resemble a soft, sticky dough, making it manageable to form into adorable spheres that serve as the foundations of your cake pops.
Preparation/Setup
Start by gathering all essential ingredients and tools required for your Halloween cake pops. Preheating the oven prepares you for baking, and ensuring your workspace is clean and organised helps keep the cooking process enjoyable.
Follow the instructions on the cake mix box carefully to ensure proper baking. Once baked, patience is required. Allow the cake to cool completely on a wire rack before crumbling, as warm cake will result in a sticky mess. Use your hands to crumble the cake into fine pieces, ensuring there are no large lumps.
After crumbling, gradually mix in frosting, starting with half a cup. As you blend, observe the texture and stop when it reaches that perfect soft, sticky feel. It’s easy to want to add more frosting, but be cautious. Overmixing can lead to a soggy mixture.
Ingredients
Here are the ingredients you will need to make Halloween cake pops:
- 1 box of cake mix (any flavour)
- Eggs, oil, and water (as required by the box)
- ½ to 1 cup frosting (either cream cheese or chocolate)
- 12 oz of candy melts or chocolate (colours: orange, black, white, or green)
- 24 lollipop sticks
- Candy eyeballs
- Halloween sprinkles
- Coloured sugar (orange, black, or purple)
- Gel food coloring (for tinting white chocolate, if desired)
- Red gel icing (for adding eyeball veins)
- Green frosting or fondant (to create pumpkin stems)
Directions
-
Bake the Cake: Prepare and bake the cake mix according to the package instructions. Allow the cake to cool completely on a wire rack.
-
Crumble and Mix: Once cooled, crumble the cake into a large mixing bowl until fine crumbs form. Gradually add frosting, starting with ½ cup, and mix until the texture resembles soft, sticky dough. Be careful not to overmix.
-
Roll Into Balls: Scoop the mixture and roll it into 1-inch balls. Place these cake balls on a lined baking sheet. Refrigerate for 1–2 hours, or freeze for 30 minutes until firm.
-
Insert Sticks: Melt a small amount (about 2 oz) of candy melts. Dip one end of each lollipop stick into the melted chocolate, then insert it into each chilled cake ball. Chill again for about 10 minutes.
-
Dip and Decorate: Melt the remaining candy melts. Dip each cake pop fully into the melted chocolate, gently tapping off the excess. While the coating is still wet, sprinkle with Halloween decorations like candy eyeballs, sprinkles, or coloured sugar.
-
Let Set: Place the cake pops upright into a Styrofoam block or into a box with holes poked in it. Allow them to dry completely at room temperature (about 15 to 20 minutes) or in the refrigerator (about 10 minutes).
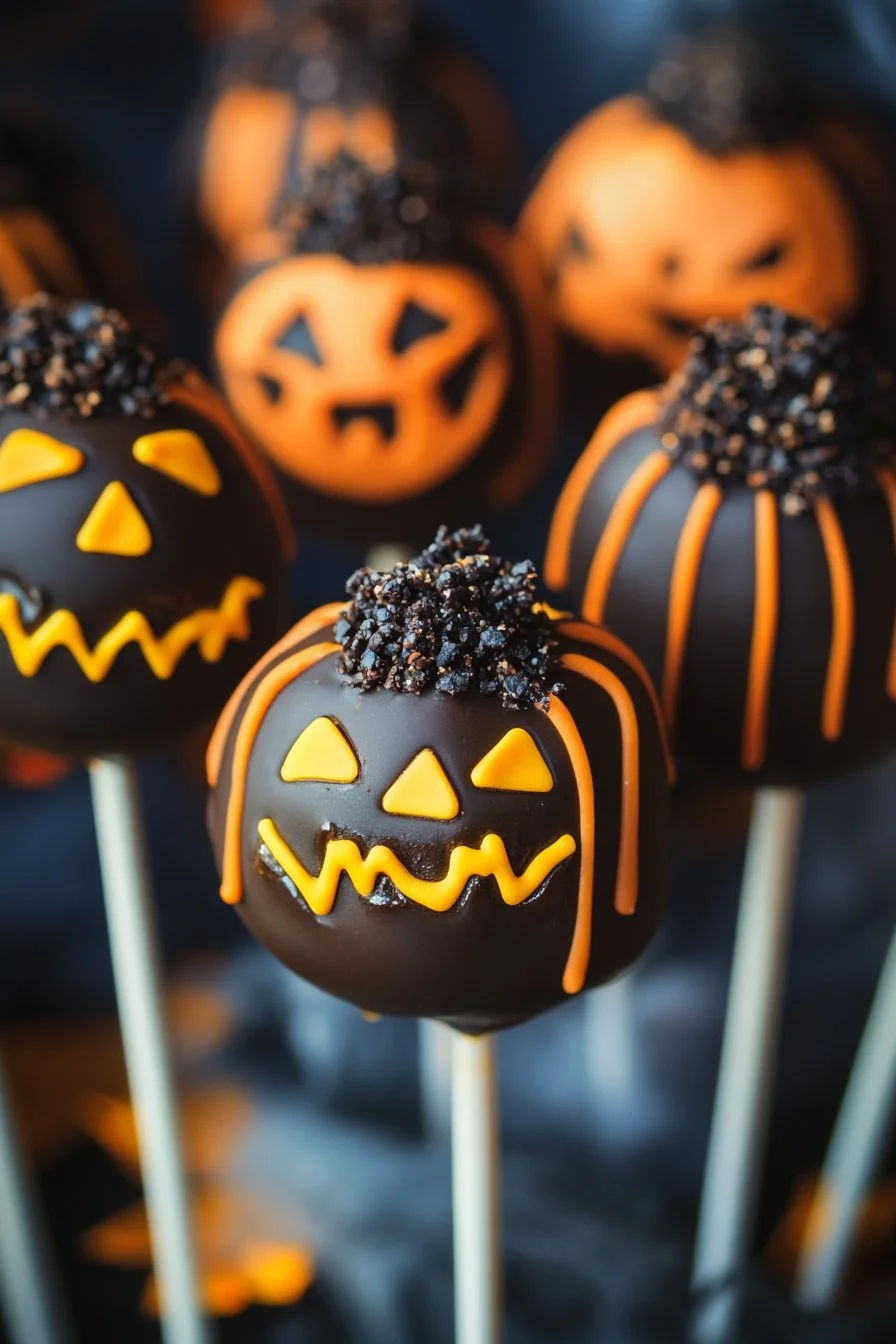
Crafting Spooky Cake Pops
Technique
Creating visually stunning Halloween cake pops requires some technique. Melt the candy melts carefully, ensuring they achieve a smooth, even consistency. Overheating can create clumps, ruining the dipping process. Using a microwave in short bursts allows for better control.
When dipping, make sure to fully submerge each cake pop. Letting excess chocolate drip off prevents the cake pops from having a thick coating, ensuring they come out just right. Practising your dipping technique will build confidence.
The arrangement and placement of decorative toppings take these treats to the next level. Be imaginative when applying candy eyeballs, Halloween sprinkles, or coloured sugar.
Tips and Tricks
Always keep your cake pops cool while decorating. The warm environment can make the chocolate coating runny and less actionable. If chocolate starts to harden, warming it slightly in the microwave can help maintain smoothness.
Don’t hesitate to experiment. Use gel food coloring to tint the candy melts to match your Halloween theme. This can add unique flair to your cake pops, making them even spookier.
Using a Styrofoam block for drying is practical. It keeps your cake pops upright, allowing the decorations to set and ensuring they remain intact when serving.
Perfecting Halloween Cake Pops
Perfecting Results
Achieving perfect Halloween cake pops comes down to practice and a few tips. Ensure cake balls are entirely chilled before dipping. The cold temperature keeps them firm and prevents crumbling.
If you notice dips or cracks in the coating after setting, a second coat can help restore the appearance. Just carefully re-dip the cake pops, allowing the new coating to adhere well.
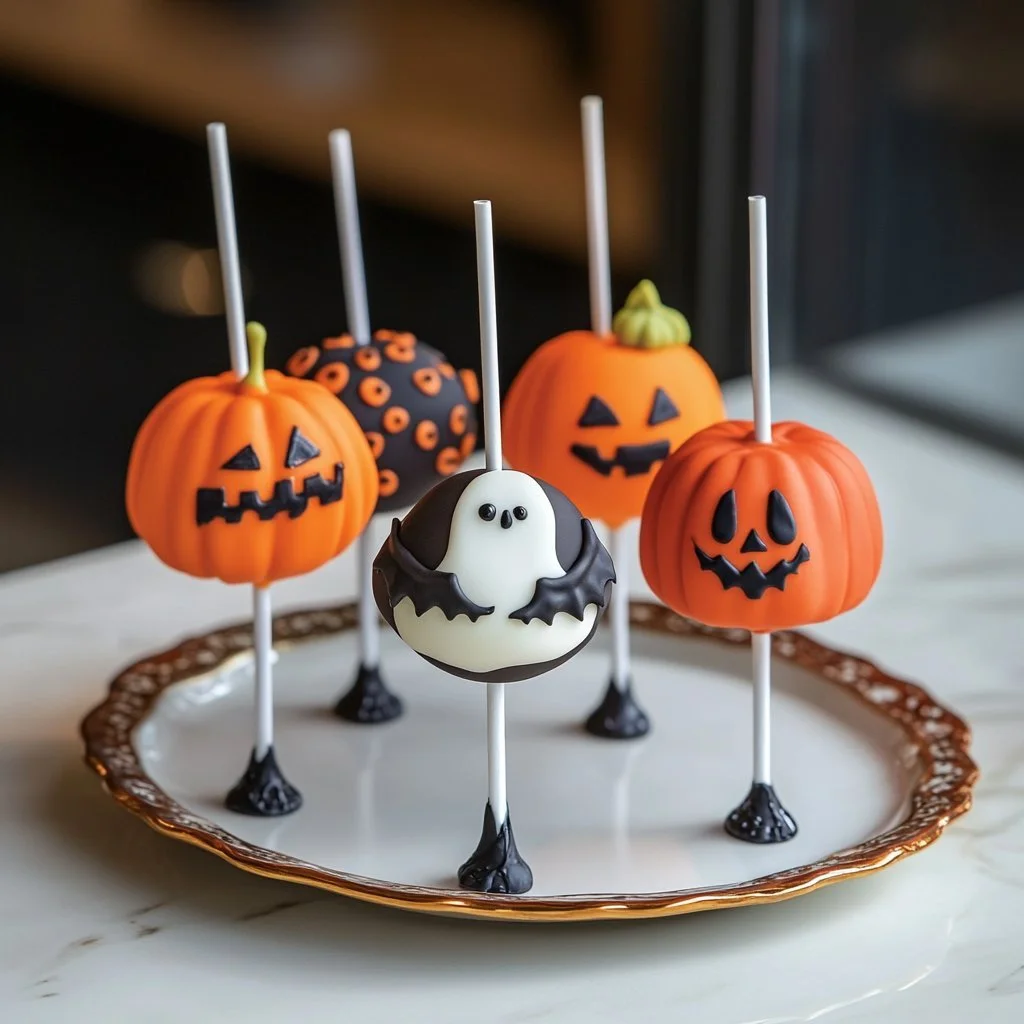
Consider experimenting with various designs and colours. Creating themed cake pops enhances the festive vibe. Halloween offers endless inspirations, from witch hats to mummies.
Troubleshooting and Variations
Understanding common issues helps improve your cake pop-making skills. If the cake pops crumble during dipping, they may not have been chilled sufficiently. Ensure they are firm before starting the dipping process.
If the coating doesn’t adhere well, you might need to check the chocolate’s temperature or consistency. Sometimes, adding a bit of vegetable oil to the melted chocolate can create a smoother dip.
Feel free to explore variations with different flavours of cake mix and frosting. Combining unique flavours can surprise and delight your guests.
Presenting Halloween Cake Pops
Serving and Presentation
Serving Halloween cake pops can be a fun experience. Use vibrant platters or spooky stands to showcase your treats. Sticking them into pumpkins or using ghoulish decorations makes the presentation more striking and thematic.
Creating different heights in your display enhances visual appeal. You can experiment with various arrangements to impress your guests.
Pairings and Storage
Halloween cake pops pair wonderfully with festive drinks and snacks. Consider serving them alongside apple cider or an assortment of party popcorn varieties. They also taste great with seasonal desserts, enhancing your Halloween spread.
For storage, keep the cake pops in an airtight container at room temperature. They will retain their freshness for several days. For longer storage, consider refrigerating them, but allow them to reach room temperature before serving for the best taste.
This Halloween, indulge in the joys of baking and creativity by making festive cake pops. Celebrate with fun designs and flavours, creating lasting memories with friends and family.
Here, experimentation leads to delightful rewards, resulting in treats that will charm everyone sharing in the festivities. Enjoy the adventure of making Halloween cake pops, and let your imagination run wild in the kitchen!
Halloween Cake Pops
Ingredients
Method
- Prepare and bake the cake mix according to the package instructions. Allow the cake to cool completely on a wire rack.
- Once cooled, crumble the cake into a large mixing bowl until fine crumbs form.
- Gradually add frosting, starting with ½ cup, and mix until the texture resembles soft, sticky dough. Be careful not to overmix.
- Scoop the mixture and roll it into 1-inch balls. Place these cake balls on a lined baking sheet.
- Refrigerate for 1–2 hours, or freeze for 30 minutes until firm.
- Melt a small amount (about 2 oz) of candy melts. Dip one end of each lollipop stick into the melted chocolate, then insert it into each chilled cake ball.
- Chill again for about 10 minutes.
- Melt the remaining candy melts. Dip each cake pop fully into the melted chocolate, gently tapping off the excess.
- While the coating is still wet, sprinkle with Halloween decorations like candy eyeballs, sprinkles, or coloured sugar.
- Place the cake pops upright into a Styrofoam block or into a box with holes poked in it. Allow them to dry completely at room temperature (about 15 to 20 minutes) or in the refrigerator (about 10 minutes).