
📑 Table of Contents ▶
- Part 1 — Mastering Birthday Cake Pops
- Fundamentals
- Preparation/setup
- Directions
- Part 2 — Decorating Techniques
- Technique
- Tips/tricks
- Part 3 — Perfecting Your Cake Pop Results
- Perfecting results
- Troubleshooting/variations
- Part 4 — Serving and Presenting
- Serving/presentation
- Pairings/storage
- Birthday Cake Pops
- Ingredients
- Method
Starbucks Copycat Birthday Cake Pops
Welcome to Eatimi! I’m Olivia Hart — a home-cook who believes delicious food doesn’t need complicated techniques. Here I share easy everyday recipes, family meals, quick ideas for busy days and helpful kitchen tips to make cooking simple and fun. My goal is to help you feel confident in the kitchen and enjoy homemade food with joy, comfort and love. 💛
Creating homemade birthday cake pops can feel like an intimidating task, but it’s a delightful project that’s worth every moment. I remember the first time I attempted to recreate those iconic Starbucks birthday cake pops. I was motivated by the joy those tiny treats brought to my family, especially during celebrations. Each bite had a sweetness that perfectly captured the essence of a birthday.
The process of making cake pops may seem lengthy, but with each step, you’ll find the fun and excitement grow. Using store-bought cake mix cuts down your preparation time, meaning more time for creativity and decoration. The transformation from simple cake batter into gorgeous, colourful cake pops is magical. At the end of the day, these Starbucks Copycat Birthday Cake Pops will not only taste heavenly but will also add a beautiful touch to any party.
Let’s dive into this sweet adventure and create perfect birthday cake pops that everyone will adore!
Part 1 — Mastering Birthday Cake Pops
Fundamentals
To create the ultimate birthday cake pops, you need to understand the process from start to finish. Begin with a solid cake base using a store-bought vanilla cake mix. The simplicity of a pre-packaged mix allows you to focus on your design and decoration instead of getting bogged down by complex recipes. You’ll find the consistency and flavour quite satisfying!
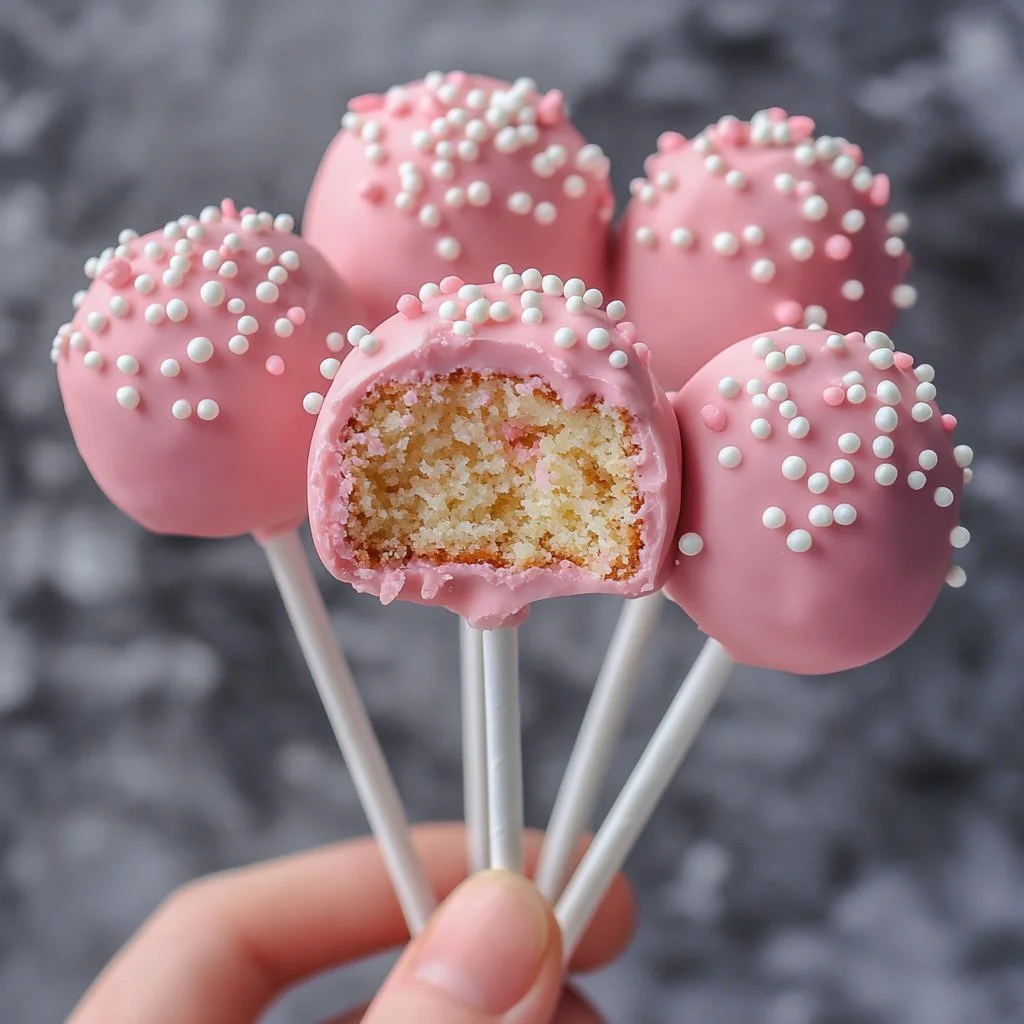
What makes these pops irresistible is the combination of cake crumbles and creamy buttercream. The richness of the buttercream binds the cake together, allowing you to form those perfect little balls. Each cake pop will deliver a delightful mix of soft cake and sweet icing, offering joy with every bite.
Preparation/setup
Prepare your workspace and gather all the ingredients needed to streamline the cooking process. Preheat your oven to 325-350°F (162-175°C) and grease or line your baking pan. Combining all your ingredients in a large bowl makes for a smooth batter. Mix until fully combined and pour into the baking pan, following the box instructions for baking time.
Don’t skip the vital step of checking for doneness a few minutes early. A toothpick poked into the centre will help you determine if the cake has baked through perfectly. Once done, remove it from the oven and allow it to cool slightly before crumbling. This step is crucial as it results in a moist and fluffy cake pop foundation.
Ingredients
For these mouth-watering cake pops, you will need:
- 13.25 oz store-bought vanilla cake mix
- ⅓ cup neutral oil (vegetable, avocado, canola, etc.)
- 1 cup milk or water
- 4 large eggs
- ¼ cup unsalted butter (softened)
- 1 cup powdered sugar
- 1 tsp vanilla extract
- Pinch of salt
- 1 tsp milk (add more if needed)
- 12 oz candy melts
- White nonpareils or sprinkles
Gather these ingredients, as they’ll help you create cake pops that are as visually appealing as they are delicious. The combination of cake mix, eggs, and oil helps produce a moist cake that forms beautifully into pops.
Directions
- Preheat your oven to 325-350°F (162-175°C) and prepare your baking pan.
- Combine all cake ingredients in a large bowl and stir until smooth.
- Pour the batter into the prepared pan and bake according to box instructions. Check for doneness by inserting a toothpick into the centre, 2-4 minutes before the recommended time.
- Once baked, transfer the cake to a stand mixing bowl while still hot.
- Crumble the cake using a paddle attachment until no large pieces remain.
- In a separate bowl, combine buttercream ingredients — softened butter, powdered sugar, vanilla extract, and a pinch of salt. Mix until smooth.
- Incorporate the buttercream into the crumbled cake until evenly blended.
- Roll the mixture into 1¼-inch balls and chill in the freezer for 15 minutes.
- Allow the cake balls to return to room temperature for an additional 10 minutes.
- Melt a small amount of candy melts in the microwave, stirring in 15-30 second increments until smooth.
- Dip the tip of each lollipop stick into the melted candy before inserting it into the cake balls halfway.
- Chill the cake pops again in the freezer for 15 minutes.
- Melt the remaining candy melts and dip each cake pop until fully coated. Tap gently to remove excess candy melts.
- Quickly decorate with sprinkles or nonpareils before they harden.
- Use a styrofoam block to keep the finished cake pops upright as they dry.
Part 2 — Decorating Techniques
Technique
Crafting your cake pops involves not just baking but also aesthetic skills. Once your cake balls chill, melting the candy melts should be a smooth process. It’s vital to maintain the right temperature, ensuring the candy doesn’t burn or seize up. Stirring steadily gives you a creamy dip for that perfect finish.
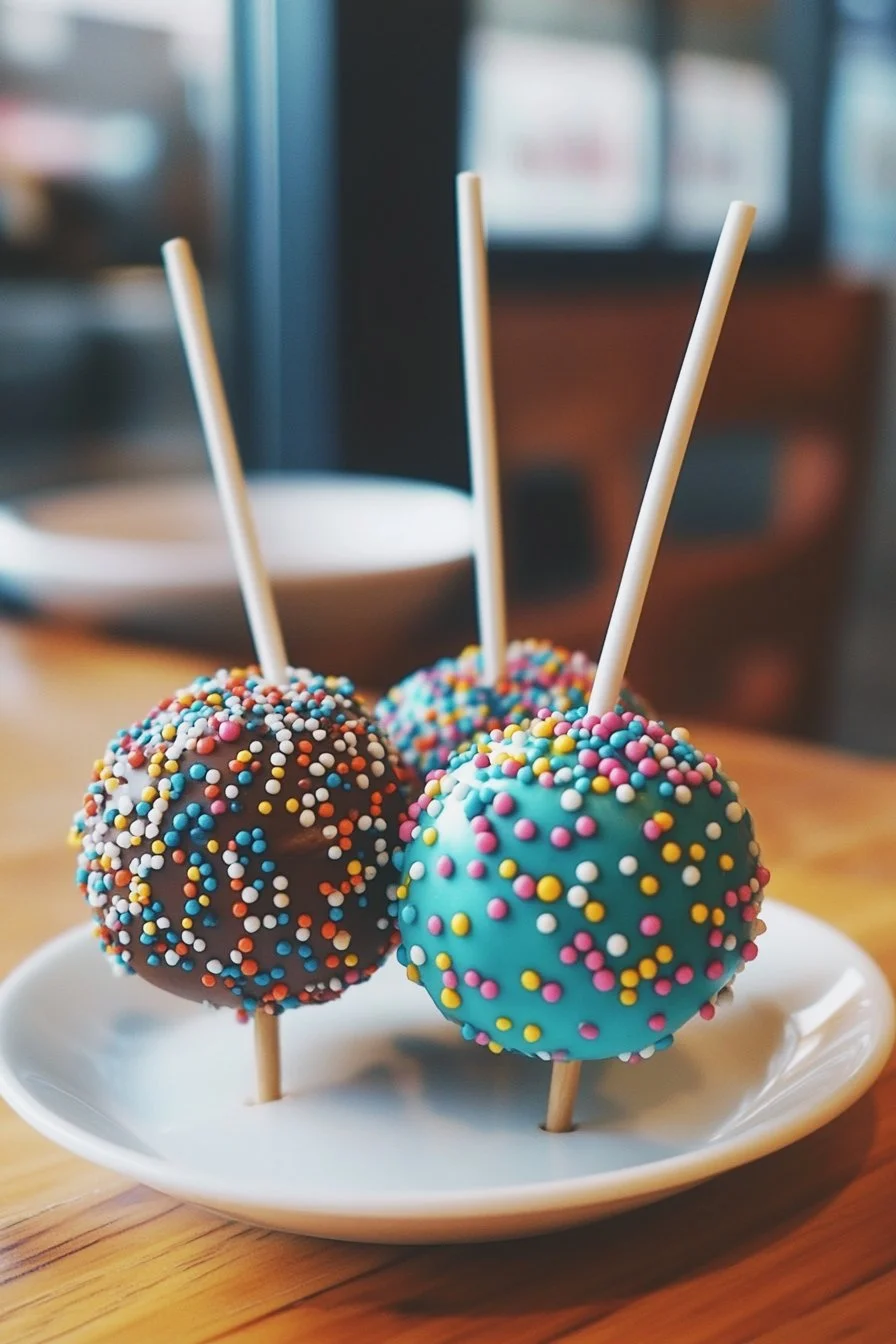
Decorating offers a chance to get creative. Whether you choose vibrant colours for birthday celebrations or a classic white with tiny sprinkles, you have endless options. The speed of decorating right after dipping ensures the candy melts still adhere well.
Tips/tricks
Having the right tools helps immensely. Use lollipop sticks that offer sturdy support for your cake pops. Consider investing in a styrofoam block or cake pop holder to help keep your pops upright while they cool and set. This way, you can focus entirely on beautiful presentation.
Also, don’t overlook the importance of chilling your cake pops in between steps. This helps maintain the shape and prevents them from falling apart when you apply the coating. It makes the entire process smoother, allowing you to concentrate on creativity rather than worrying about technique.
Part 3 — Perfecting Your Cake Pop Results
Perfecting results
To achieve a flawless finish, practice patience. Allow your cake pops to cool fully before you start dipping. If the candy melts become too thick, pop them back into the microwave for a few seconds to regain that pouring consistency. Consistency in your candy coating leads to that professional look.
While decorating, make sure not to overload your pops with candy melts. A gentle tap helps remove any excess while ensuring a nice even layer.
Troubleshooting/variations
Creating cake pops can present challenges, but adjustments can lead to delightful outcomes. If the cake mixture feels too dry, consider adding a little extra milk to achieve the desired consistency. You want the cake pop mixture to hold together without being sticky or crumbly.
If you find your cake pops aren’t holding their shape after being dipped, that may indicate they’re too warm or the chocolate coating is too thin. A good chilling session after forming the balls often helps to solidify them, ensuring they stand proud.
Part 4 — Serving and Presenting
Serving/presentation
Beautifully presented cake pops not only please the eye but entice the palate. Consider arranging your finished pops on a decorative platter or cake stand for parties. The white nonpareils or festive sprinkles offer an attractive touch that screams celebration.
These cake pops can also serve as delightful party favours. Presenting them in clear bags tied with ribbons creates wonderful gifts for guests to take home.
Pairings/storage
These cake pops pair well with a variety of treats. Consider offering them alongside cupcakes, cookies, or fruit platters for a varied dessert table. The vibrant colours and fun shapes make them a perfect complement for any party spread.
When it comes to storage, place your cake pops in an airtight container in the fridge. This will keep them fresh for several days, allowing you to enjoy their deliciousness long after the party’s over.
Keep them upright in your container to avoid damaging the decorations.
Creating these Starbucks Copycat Birthday Cake Pops can transform any celebration into a sweet occasion. Each bite carries the spirit of a joyful gathering, making every moment special.
Birthday Cake Pops
Ingredients
Method
- Preheat your oven to 325-350°F (162-175°C) and prepare your baking pan.
- Combine all cake ingredients in a large bowl and stir until smooth.
- Pour the batter into the prepared pan and bake according to box instructions. Check for doneness 2-4 minutes before the recommended time.
- Once baked, transfer the cake to a stand mixing bowl while still hot.
- Crumble the cake using a paddle attachment until no large pieces remain.
- In a separate bowl, combine buttercream ingredients and mix until smooth.
- Incorporate the buttercream into the crumbled cake until evenly blended.
- Roll the mixture into 1¼-inch balls and chill in the freezer for 15 minutes.
- Allow the cake balls to return to room temperature for an additional 10 minutes.
- Melt a small amount of candy melts in the microwave, stirring in 15-30 second increments until smooth.
- Dip the tip of each lollipop stick into the melted candy before inserting it into the cake balls halfway.
- Chill the cake pops again in the freezer for 15 minutes.
- Melt the remaining candy melts and dip each cake pop until fully coated.
- Tap gently to remove excess candy melts and quickly decorate with sprinkles before they harden.